
Alright, so you know how every holiday someone asks, “Is there going to be stuffing?” Well, let me tell you, a few years back my uncle, who honestly couldn’t cook toast, suggested making the stuffing bite-sized. At first, I thought he’d lost the plot, but we gave it a go — these Turkey Stuffing Balls absolutely stole the show. Now, it’s the only way my family wants stuffing! That first time we made them, someone even tried hiding extras in a napkin (you know who you are, Aunt Liz). And honestly, there’s just something so much more satisfying about picking up a hot, crispy ball than scooping out some lumpy stuff.
Why I Always Make These Turkey Stuffing Balls
I make these whenever I want to impress without actually doing much work. Seriously, these are so easy. Plus, my family loses their minds over them — even my dad who normally spends dinner criticizing everyone’s gravy. The best part though? You don’t need a mountain of time or fancy equipment (I mean, a baking tray and a bowl — that’s it). And if you’ve ever ended up with sad, soggy stuffing lodged at the back of the turkey (guilty), this is the fix. Gotta say, I never thought a side dish could save my dignity, but here we are!
What You’ll Need (and a Few Swaps That Totally Work)
- 3 cups stale bread cubes (I use sourdough or honestly whatever’s in the bread bin—white sandwich bread in a pinch, no one’s judging)
- 1 pound ground turkey (sometimes I’ve used chicken if that’s what I had left—grandma says turkey is tradition but, eh…)
- 1 medium onion, chopped (red onion works too if that’s what’s rolling around in your veggie drawer)
- 2 stalks celery, chopped (optional! I’ve skipped it accidentally before—no disasters)
- 2 cloves garlic, minced (I’m not fussy—pre-minced in a jar works fine)
- 1 large egg (or flax egg if you’re feeling wild — followed Minimalist Baker’s method once and it worked!)
- ¼ cup chicken or turkey broth (a bit extra if it looks dry, or just water in a pinch)
- 1 tablespoon chopped fresh parsley (dried works, yes, I’ve forgotten fresh a bunch)
- 1 ½ teaspoon dried sage (if you have poultry seasoning, use that and skip the extra herbs)
- 1 teaspoon salt, ½ teaspoon pepper (taste as you go – always!)
- 2 tablespoon melted butter (or olive oil – have done both, can’t really pick the winner)
How I Put Them Together (With a Few Side Comments)
- Preheat your oven to 375°F (190°C). Line a baking tray with parchment paper unless you like scraping bits off afterward…I don’t.
- Dump the bread cubes in a big bowl. Add chopped onion, celery, and garlic. Sometimes I’ll give them a quick 2-minute microwave to soften, but usually I can’t be bothered.
- Add the turkey, egg, broth, parsley, sage, salt, pepper, and melted butter right in. Get in there with your hands. (This is where I usually sneak a taste. Yes, I know you’re technically not supposed to, but I live on the edge.)
- Mix until just combined. If it’s too crumbly, splash in a tiny bit more broth. Too wet? Toss in a few more bread cubes, or honestly, cracker crumbs.
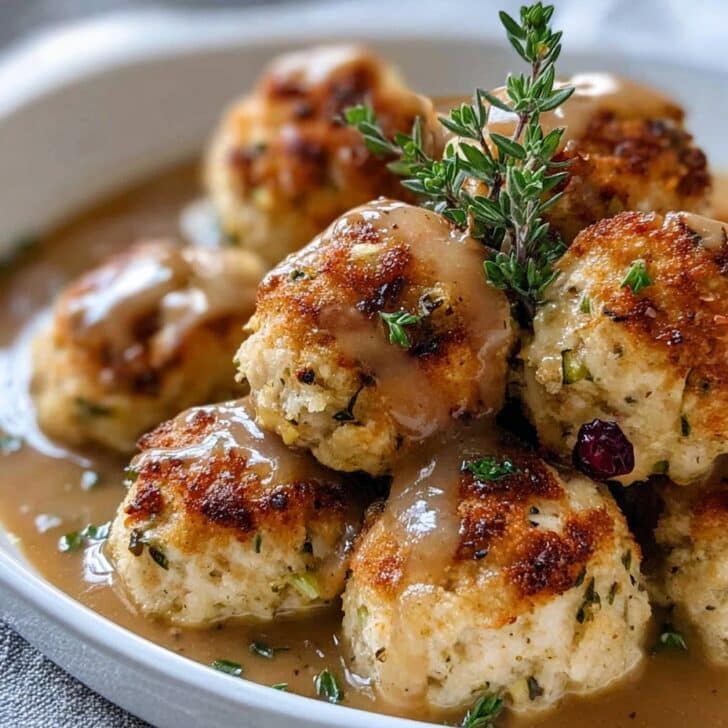
- Roll into golf-ball sized mounds (about 2 tablespoons each, but I eyeball it). Place on your tray. Think meatballs, but more lumpy.
- Bake 20–25 minutes till golden brown. Actually, I find it works better if you flip them halfway through, but I’ve also forgotten and they still turn out tasty.
- Let cool for a few (be careful, I burnt the roof of my mouth last Thanksgiving because I couldn’t wait).
What I Figured Out After a Few Tries
- Bigger bread cubes make fluffier stuffing balls — don’t get them too small or you’ll end up with misshapen lumps (speaking form experience).
- If you use dried herbs, cut back a bit—they pack more punch! Otherwise, you’ll have what my niece calls “herb bombs.”
- Letting the mixture sit for 5 minutes soaks up the broth better, but honestly? I’m usually too hungry.
- Once I tried adding cheese (parmesan), and it kinda made a weird texture, so… maybe skip that.
Variations (and That One That Flopped)
I’ve swapped in vegan sausage for the turkey (turned out better than I expected), and once threw in some dried cranberries — loved it, though my sister said it was “too sweet for stuffing.” I tried sourdough rye once (I mean, who hasn’t bought the wrong loaf?) and, honestly, that was a little strange. I think sticking with plain-ish bread is safest, but hey, you do you.
What You’ll Need Kitchen-wise (and How I Fudged It Once)
- A big mixing bowl (I’ve used a soup pot when every other bowl was in the dishwasher)
- Baking tray (cookie sheet with tin foil also worked before when mine was MIA)
- Parchment paper, but you’ll survive with a buttered tray
- Clean hands (best tool anyway; a wooden spoon if you’re squeamish)
Oh, look, if you’re really in a jam and have no oven, I suppose you could try air frying these — here’s someone who makes that look easy.

How to Store (If You Even Need To)
I keep these in an airtight thing in the fridge, but to be honest, they rarely last more than a day. If for some crazy reason you have leftovers, they actually taste better cold (at least I think so). Reheat in the oven for crispness—microwave turns ‘em sad. You could freeze them, but in my experience, they get a little different, almost spongey. Still edible, but not their finest hour.
How I Serve ‘Em (And The Weird Traditions We Have)
We always pile them high in a big bowl and put them right in the middle of the table. I kind of like dunking mine in gravy, but my cousin swears by cranberry sauce, so… pick your side! Sometimes, late at night, I eat them cold straight form the fridge (yes, I admit it). Once, someone sandwiched two around a bit of turkey and claimed it was genius—jury’s still out.
Pro Tips aka My Learning-‘The-Hard Way’ Advice
- Don’t pack the balls too tight or you’ll get little cannonballs, not stuffing balls. I learned that lesson thanks to my impatience.
- Don’t skimp on the fat (butter or oil), or they’ll come out kinda dry. I once tried going low fat and, well, it just wasn’t worth it. Sometimes “healthy-ish” is enough.
- Taste as you go. I forgot to check the salt once and, let’s just say, there wasn’t enough gravy in the world to fix it.
FAQ (Real Questions, Sometimes Weirdly Written)
- Can I use pre-made stuffing mix? Actually, yes! Just mix in the ground turkey and egg. I’ve done it when I was rushing. Add a splash of broth if it’s too dry.
- Can I double this for a crowd? For sure—though watch your oven. I tried cramming two trays in once, and the bottoms didn’t brown. Oops!
- Is it okay to make them ahead? Absolutely, but don’t bake till right before eating if you can—texture’s better (unless you like them soft, then go wild).
- What if I have no turkey? Chicken works fine, or go for a veggie version with mushrooms and walnuts—got that idea from Angela’s vegan stuffing and it’s solid.
- Why are mine falling apart? Too little egg or the mix is too dry. Really smoosh things together and add more broth till it all holds.
Alright, I’ve rambled long enough. Go make a batch and just don’t eat them all before the guests arrive. Or do—your secret’s safe with me!

Ingredients
- 2 cups cooked turkey, shredded or finely chopped
- 3 cups seasoned stuffing mix
- 1/2 cup chicken broth
- 2 large eggs
- 1/2 cup celery, finely diced
- 1/3 cup onion, finely diced
- 3 tablespoons unsalted butter, melted
- 1 teaspoon dried sage
- Salt and pepper to taste
Instructions
-
1Preheat your oven to 375°F (190°C) and line a baking sheet with parchment paper.
-
2In a large bowl, combine the stuffing mix, shredded turkey, celery, onion, and dried sage.
-
3In a small bowl, whisk together the eggs, melted butter, and chicken broth. Pour the mixture over the turkey and stuffing mixture.
-
4Mix everything together until well combined and moist. Season with salt and pepper to taste.
-
5Shape the mixture into 12 evenly sized balls and place them on the prepared baking sheet.
-
6Bake for 30-35 minutes, or until the stuffing balls are golden brown and cooked through. Serve warm.
Approximate Information for One Serving
Nutrition Disclaimers
Number of total servings shown is approximate. Actual number of servings will depend on your preferred portion sizes.
Nutritional values shown are general guidelines and reflect information for 1 serving using the ingredients listed, not including any optional ingredients. Actual macros may vary slightly depending on specific brands and types of ingredients used.
To determine the weight of one serving, prepare the recipe as instructed. Weigh the finished recipe, then divide the weight of the finished recipe (not including the weight of the container the food is in) by the desired number of servings. Result will be the weight of one serving.
Did you make this recipe?
Please consider Pinning it!!