
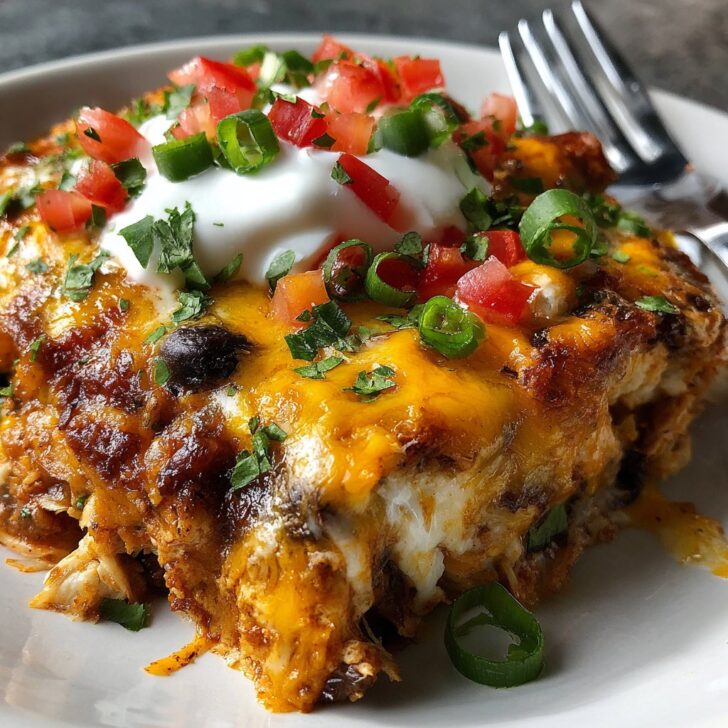

Hey y'all! If you're searching for a meal that's equal parts creamy, cheesy, and crowd-pleasing, this Sour Cream Chicken Enchilada Bake delivers big flavor with minimal fuss. Whether it's a weeknight dinner, a potluck, or just a comfort food craving, this bubbly, golden bake is sure to hit the spot. Let's get cooking!
Why You'll Love This Sour Cream Chicken Enchilada Bake
- Quick to assemble and perfect for busy nights.
- Ultra-creamy, cheesy layers keep every bite moist and flavorful.
- Family-friendly and easily customizable for picky eaters.
- Great for meal prep—leftovers taste even better the next day!
- Ideal for potlucks, gatherings, or cozy nights in.
Sour Cream Chicken Enchilada Bake Ingredients
- 3 cups cooked chicken, shredded
- 2 cups shredded Monterey Jack cheese, divided
- 1 cup shredded cheddar cheese
- 1 (10-ounce) can green enchilada sauce
- 1 (10.5-ounce) can cream of chicken soup
- 1 cup sour cream
- 1 (4-ounce) can diced green chiles, drained
- 8-10 flour tortillas (8-inch size)
- 1 teaspoon garlic powder
- 1 teaspoon onion powder
- ½ teaspoon ground cumin
- Salt and black pepper, to taste
- Chopped cilantro, for garnish (optional)
How to Make Sour Cream Chicken Enchilada Bake
Step 1: Prep and Preheat
Preheat your oven to 350°F (175°C). Lightly grease a 9x13-inch baking dish with nonstick spray.
Step 2: Mix the Creamy Filling
In a large bowl, combine the shredded chicken, half of the Monterey Jack cheese (1 cup), cream of chicken soup, sour cream, green chiles, garlic powder, onion powder, cumin, salt, and pepper. Stir until fully incorporated.
Step 3: Layer the Enchiladas
Spread ¼ cup of enchilada sauce over the bottom of your prepared baking dish. Place a layer of tortillas (tearing to fit as needed) over the sauce. Top with half the chicken mixture. Drizzle on some enchilada sauce. Repeat, finishing with a layer of tortillas and the remaining enchilada sauce poured over the top.
Step 4: Add Cheese and Bake
Sprinkle the remaining Monterey Jack and all the cheddar cheese evenly over the top. Bake uncovered for 30-35 minutes, or until hot and bubbly and the cheese is golden brown.
Step 5: Garnish and Serve
Let the bake cool for 5-10 minutes before serving. Garnish with chopped cilantro if desired. Enjoy!
Notes for the Best Sour Cream Chicken Enchilada Bake
- Use rotisserie chicken for convenience and extra flavor. Need tips for shredding chicken fast? Check out this guide from The Kitchn.
- If you like a little heat, add diced jalapeños or use spicy green chiles.
- Swap flour tortillas for corn tortillas if you prefer a more traditional Mexican flavor. Here's a primer on corn vs. flour tortillas from Bon Appétit.


Sour Cream Chicken Enchilada Bake Variations
- Veggie Version: Replace chicken with black beans, corn, and sautéed bell peppers for a vegetarian twist.
- Red Sauce Swap: Substitute green enchilada sauce with red for a deeper, richer flavor.
- Low-Carb: Use low-carb tortillas or layer with grilled zucchini slices instead of tortillas.
Required Equipment for Sour Cream Chicken Enchilada Bake
- 9x13-inch baking dish
- Large mixing bowl
- Cheese grater
- Measuring cups and spoons
- Spatula or spoon
Storage Instructions for Sour Cream Chicken Enchilada Bake
Store leftovers in an airtight container in the refrigerator for up to 4 days. To reheat, microwave individual portions or bake covered at 350°F until warmed through. You can also freeze baked enchilada bake for up to 2 months; thaw overnight in the fridge before reheating.
Sour Cream Chicken Enchilada Bake Serving Suggestions
- Serve with Mexican rice, refried beans, or a fresh green salad.
- Add a side of guacamole, salsa, and tortilla chips for extra flavor and crunch.
- Top each slice with extra sour cream or sliced avocado for a creamy finish.
Pro Tips for the Best Sour Cream Chicken Enchilada Bake
- Let the bake rest for 10 minutes before serving to help it set and slice cleanly.
- Grate your own cheese for superior melt and flavor—pre-shredded cheese often has anti-caking agents. See more about grating cheese at Serious Eats.
- Double the recipe and freeze half for future busy nights.
Sour Cream Chicken Enchilada Bake FAQ
- Can I use corn tortillas instead of flour?
- Absolutely! Corn tortillas add great flavor and work just as well—just warm them slightly so they don't tear.
- Can I make this ahead of time?
- Yes, you can assemble the bake up to 24 hours in advance; cover and refrigerate, then bake as directed when ready.
- Is this recipe spicy?
- This bake is mild, but you can add diced jalapeños or use a spicy enchilada sauce for extra heat.
Prep time: 15 minutes
Cook time: 35 minutes
Total time: 50 minutes


Ingredients
- 2 cups cooked shredded chicken
- 8 small flour tortillas
- 2 cups shredded Monterey Jack cheese
- 1 cup sour cream
- 1 can (10 oz) green enchilada sauce
- ½ cup chopped green chilies
- ½ cup chopped onion
- 1 tablespoon olive oil
- 1 teaspoon garlic powder
- Salt and pepper to taste
Instructions
-
1Preheat the oven to 350°F (175°C). Grease a 9x13-inch baking dish.
-
2In a skillet, heat olive oil over medium heat. Add chopped onion and cook until softened, about 3 minutes.
-
3In a large bowl, combine shredded chicken, cooked onion, green chilies, garlic powder, salt, and pepper. Mix well.
-
4Fill each tortilla with the chicken mixture and a sprinkle of cheese. Roll up and place seam-side down in the prepared baking dish.
-
5In a separate bowl, mix sour cream and green enchilada sauce until smooth. Pour evenly over the enchiladas.
-
6Top with remaining cheese. Bake for 30 minutes, or until bubbly and golden. Serve hot.
Approximate Information for One Serving
Nutrition Disclaimers
Number of total servings shown is approximate. Actual number of servings will depend on your preferred portion sizes.
Nutritional values shown are general guidelines and reflect information for 1 serving using the ingredients listed, not including any optional ingredients. Actual macros may vary slightly depending on specific brands and types of ingredients used.
To determine the weight of one serving, prepare the recipe as instructed. Weigh the finished recipe, then divide the weight of the finished recipe (not including the weight of the container the food is in) by the desired number of servings. Result will be the weight of one serving.
Did you make this recipe?
Please consider Pinning it!!