
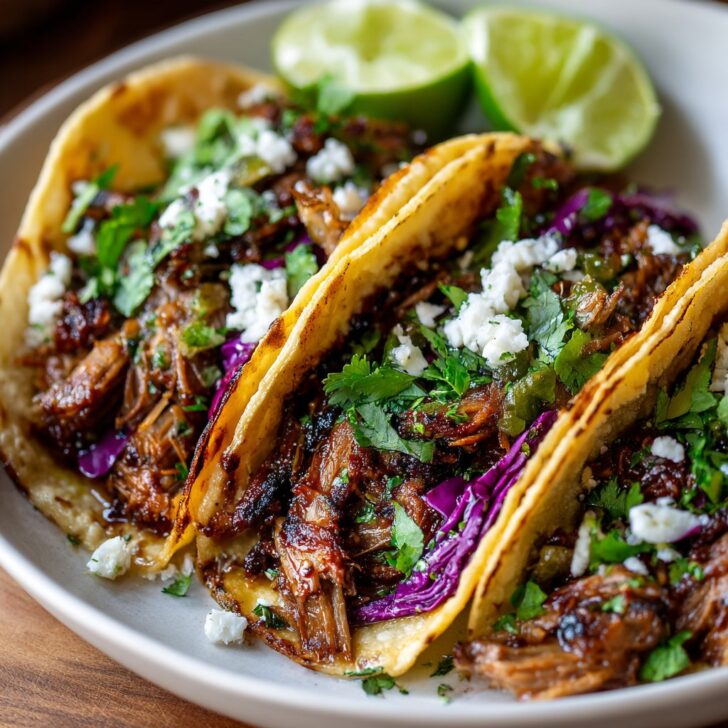

Hey y'all! Ready to make your kitchen smell downright irresistible? This recipe for crispy pork carnitas for tacos or bowls delivers golden, fork-tender chunks of pork with edges that are perfectly crisp – just begging to be loaded into tacos, piled onto bowls, or served however your heart desires. Whether you're planning a laid-back family dinner or feeding a hungry crowd at your next get-together, these carnitas are guaranteed to impress. Let's get cooking!
Why You'll Love This Crispy Pork Carnitas for Tacos or Bowls Recipe
- Juicy, flavorful pork with crispy, caramelized edges every time.
- Perfect for meal prep—make a big batch and enjoy all week.
- Versatile: ideal for tacos, burrito bowls, nachos, or salads.
- Simple ingredients and minimal effort for maximum flavor.
- Freezer-friendly so you can always have carnitas on hand!
Ingredients for Crispy Pork Carnitas for Tacos or Bowls
- 4 lbs boneless pork shoulder (pork butt), trimmed and cut into 3-inch chunks
- 2 teaspoon salt
- 1 teaspoon black pepper
- 1 tablespoon ground cumin
- 2 teaspoon dried oregano
- 1 large yellow onion, quartered
- 4 cloves garlic, smashed
- 2 bay leaves
- 1 orange, juiced (about ⅓ cup juice)
- 1 lime, juiced
- 1 cup chicken broth
How to Make Crispy Pork Carnitas for Tacos or Bowls
Step 1: Prep and Season the Pork
Pat the pork shoulder chunks dry. Rub with salt, pepper, cumin, and dried oregano, making sure all sides are well coated.
Step 2: Slow Cook the Carnitas
Add seasoned pork, onion, garlic, and bay leaves to a large Dutch oven or slow cooker. Pour in the orange juice, lime juice, and chicken broth. If using a Dutch oven, cover and cook at 300°F (150°C) for 3 hours, stirring halfway. For a slow cooker, set to low for 7-8 hours or high for 4-5 hours, until the pork is fall-apart tender.
Step 3: Shred and Crisp the Pork
Remove pork from pot and shred with two forks. For those signature crispy edges, spread the pork in an even layer on a large baking sheet. Broil on high for 4-6 minutes, tossing once, until the carnitas are golden and crispy.
Step 4: Serve and Enjoy!
Spoon crispy pork carnitas into warm tortillas or over rice bowls. Garnish with fresh cilantro, chopped onion, and a squeeze of lime.
Notes: Tips for Perfect Crispy Pork Carnitas for Tacos or Bowls
- If your pork isn't crisping up enough under the broiler, drizzle a bit of the reserved cooking liquid over the meat before broiling for extra flavor and moisture.
- For more info on slow cooking techniques, check out this guide to slow-cooker carnitas from Serious Eats.
- Swap orange juice for pineapple juice for a sweeter twist.


Variations: Crispy Pork Carnitas for Tacos or Bowls
- Spicy Carnitas: Add 1-2 diced chipotle peppers in adobo sauce to the cooking liquid.
- Citrus Twist: Use a mix of orange, lime, and grapefruit juice for a zesty flavor punch.
- Paleo/Keto: Substitute chicken broth with bone broth and serve with cauliflower rice bowls.
Required Equipment for Crispy Pork Carnitas for Tacos or Bowls
- Large Dutch oven or slow cooker
- Cutting board and sharp knife
- Baking sheet for broiling
- Tongs or forks for shredding
Storage Instructions: Crispy Pork Carnitas for Tacos or Bowls
Store leftover carnitas in an airtight container in the refrigerator for up to 4 days. For longer storage, portion cooled carnitas into freezer-safe bags and freeze for up to 3 months. Reheat in the oven or on the stovetop to restore crispiness.
Suggested Pairings and Serving Ideas for Carnitas
- Serve with warm corn tortillas, pico de gallo, and fresh guacamole for classic tacos.
- Build a burrito bowl with rice, beans, salsa, and lettuce.
- Top nachos with crispy pork carnitas, cheese, and jalapeños for the ultimate snack.
- For nutrition info and serving suggestions, visit Eat Right's healthy eating guide.
Pro Tips for the Best Crispy Pork Carnitas for Tacos or Bowls
- Let the pork rest for 5 minutes after shredding so it soaks up all the juices before crisping.
- Broil in batches if needed; overcrowding the pan can prevent crispiness.
- For extra flavor, toss the shredded pork with some pan drippings before broiling. For more on browning techniques, check out Bon Appetit's guide to browning meat perfectly.
FAQ: Crispy Pork Carnitas for Tacos or Bowls
- Can I make crispy pork carnitas ahead of time?
- Absolutely! Carnitas reheat beautifully—just broil again for a few minutes to regain that crispy texture.
- What cut of pork is best for carnitas?
- Pork shoulder (also called pork butt) is the best choice thanks to its marbling and fat content, which gives you juicy, tender meat.
- Can I use the Instant Pot instead of slow cooking?
- Yes! Pressure cook on high for 60 minutes, naturally release for 15 minutes, then crisp as directed.
Prep time: 15 minutes
Cook time: 3 hours 15 minutes (Dutch oven) or 7-8 hours (slow cooker)
Total time: 3.5 hours (Dutch oven) or 8 hours 15 minutes (slow cooker)


Ingredients
- 3 lbs pork shoulder, boneless, cut into large chunks
- 1 tablespoon kosher salt
- 1 teaspoon black pepper
- 1 tablespoon ground cumin
- 1 large onion, quartered
- 4 cloves garlic, smashed
- 1 orange, juiced
- 1 lime, juiced
- 1 cup chicken broth
- 2 tablespoons vegetable oil
Instructions
-
1Season the pork shoulder pieces with salt, pepper, and cumin. Place them in a large Dutch oven or slow cooker.
-
2Add the quartered onion, smashed garlic, orange juice, lime juice, and chicken broth to the pot with the pork.
-
3Cover and cook on low heat for 2.5 hours, or until the pork is very tender and easily shreds with a fork.
-
4Remove the pork from the pot and shred it using two forks. Discard any excess fat.
-
5Heat vegetable oil in a large skillet over medium-high heat. Add the shredded pork in batches and cook until the edges are crispy, about 3-5 minutes per batch.
-
6Serve the crispy pork carnitas in tacos or bowls with your favorite toppings.
Approximate Information for One Serving
Nutrition Disclaimers
Number of total servings shown is approximate. Actual number of servings will depend on your preferred portion sizes.
Nutritional values shown are general guidelines and reflect information for 1 serving using the ingredients listed, not including any optional ingredients. Actual macros may vary slightly depending on specific brands and types of ingredients used.
To determine the weight of one serving, prepare the recipe as instructed. Weigh the finished recipe, then divide the weight of the finished recipe (not including the weight of the container the food is in) by the desired number of servings. Result will be the weight of one serving.
Did you make this recipe?
Please consider Pinning it!!