
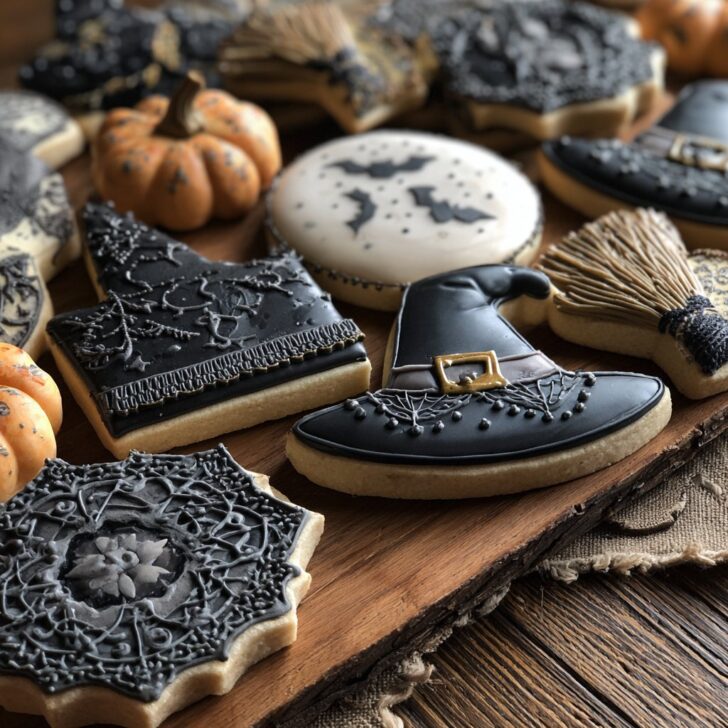

Hey y'all! Ready to add some spooky sweetness to your Halloween celebrations? These Witchy Cookies for Halloween are perfectly crispy on the outside, soft and chewy on the inside, and decked out in all kinds of magical colors and creepy-cute decorations. They're a huge hit with kids and grown-ups alike, making them ideal for parties, lunchbox treats, or just a fun weekend bake. Let's get cooking!
Why You'll Love This Witchy Cookies for Halloween Recipe
- Super simple to make with pantry staples and vibrant Halloween sprinkles.
- Perfectly soft and chewy texture with a delightful chocolatey flavor.
- Fun and customizable for parties, bake sales, or family baking nights.
- Kids love decorating these magical cookies with colorful candy eyes and witchy hats!
- Great make-ahead treat that stores well for busy holiday schedules.
Witchy Cookies for Halloween Ingredients
- 2 ¼ cups all-purpose flour
- 1 teaspoon baking soda
- ½ teaspoon salt
- 1 cup unsalted butter, softened
- ¾ cup granulated sugar
- ¾ cup packed light brown sugar
- 2 large eggs, room temperature
- 2 teaspoon pure vanilla extract
- 1 ½ cups semi-sweet chocolate chips
- ½ cup Halloween sprinkles (orange, purple, black & green)
- ½ cup candy eyes
- 12 chocolate kiss candies (for witch hats)
- 12 round chocolate wafer cookies (for hat brims)
How to Make Witchy Cookies for Halloween
Step 1: Prepare the Cookie Dough
- Preheat your oven to 350°F (175°C) and line two baking sheets with parchment paper.
- In a medium bowl, whisk together the flour, baking soda, and salt.
- In a large bowl, use an electric mixer to cream the butter, granulated sugar, and brown sugar until light and fluffy (about 2-3 minutes).
- Beat in the eggs one at a time, then mix in the vanilla extract.
- Gradually add the flour mixture to the wet ingredients, mixing just until combined.
- Fold in the chocolate chips and half the Halloween sprinkles.
Step 2: Shape and Bake Witchy Cookies
- Scoop out 2-tablespoon portions of dough and roll into balls. Place them about 2 inches apart on prepared baking sheets.
- Gently flatten slightly, then press a few candy eyes and extra sprinkles onto each ball for a spooky effect.
- Bake for 11-13 minutes, or until the edges are set but centers look slightly underbaked.
- Let cool on the baking sheet for 5 minutes before transferring to a wire rack.
Step 3: Decorate with Witch Hats
- Once cookies are completely cool, create witch hats: Place a chocolate kiss onto a chocolate wafer cookie using a dab of melted chocolate or icing as glue.
- Set a witch hat on top of each cookie, pressing gently to secure.


Witchy Cookies for Halloween Notes
- For the best soft texture, avoid over-baking—the cookies will set up as they cool.
- Get creative with decorations! Try colored icing, mini marshmallows, or edible glitter for extra flair. Check out this Halloween cookie decorating guide for more inspo.
- If you can’t find candy eyes locally, order them easily from King Arthur Baking.
Witchy Cookies for Halloween Variations
- Gluten-Free: Swap in a 1:1 gluten-free flour blend for an allergy-friendly treat.
- Double Chocolate: Add ⅓ cup cocoa powder and use white chocolate chips for a richer, spookier cookie.
- Monster Style: Add green food coloring to the dough and use monster-themed sprinkles for a different take!
Required Equipment for Witchy Cookies
- Baking sheets
- Parchment paper
- Mixing bowls (medium and large)
- Electric mixer or sturdy whisk
- Measuring cups and spoons
- Wire cooling rack
- Small offset spatula or spoon (for decorating)
Witchy Cookies Storage Instructions
Store your Witchy Cookies for Halloween in an airtight container at room temperature for up to 5 days. For longer storage, freeze undecorated cookies for up to 2 months and decorate after thawing for best results.
Serving Suggestions for Witchy Cookies for Halloween
- Pair with a mug of hot cocoa or spooky green punch at your Halloween party.
- Serve alongside a platter of other festive Halloween treats like caramel apples or popcorn balls.
- Arrange on a tiered stand with themed napkins for extra holiday magic.
Pro Tips for Perfect Witchy Cookies for Halloween
- Chill your dough for 30 minutes before baking to prevent spreading and keep cookies thick and chewy.
- Use high-quality butter and chocolate chips for the richest flavor—see this cookie science guide for more tips.
- Let cookies cool completely before adding witch hats to keep decorations from melting.
Witchy Cookies for Halloween FAQ
- Can I make Witchy Cookies for Halloween ahead of time?
- Yes! Bake and freeze plain cookies, then decorate the day you plan to serve them for best results.
- Can I use different candy for the witch hats?
- Absolutely—try mini peanut butter cups or chocolate coins for a different look!
- How do I keep the cookies soft?
- Store them with a slice of bread in the container—the bread helps retain moisture and keeps cookies chewy.
Prep time: 15 minutes
Cook time: 11-13 minutes
Total time: 30 minutes


Ingredients
- 2 ½ cups all-purpose flour
- 1 cup unsalted butter, softened
- 1 cup granulated sugar
- 1 large egg
- 1 teaspoon vanilla extract
- ½ teaspoon baking powder
- ¼ teaspoon salt
- Assorted colored icing (green, purple, orange, black)
- Candy decorations (mini chocolate chips, candy eyes, sprinkles)
Instructions
-
1Preheat the oven to 350°F (175°C) and line two baking sheets with parchment paper.
-
2In a large bowl, cream together the butter and sugar until light and fluffy. Beat in the egg and vanilla extract.
-
3In a separate bowl, whisk together the flour, baking powder, and salt. Gradually add the dry ingredients to the wet mixture, mixing until a dough forms.
-
4Roll out the dough on a lightly floured surface to about ¼-inch thickness. Use witch hat and broomstick cookie cutters to cut out shapes and place them on the prepared baking sheets.
-
5Bake for 10-12 minutes or until the edges are lightly golden. Allow cookies to cool completely on a wire rack.
-
6Decorate cooled cookies with colored icing and candy decorations to create witchy faces, hats, and broomsticks. Let icing set before serving.
Approximate Information for One Serving
Nutrition Disclaimers
Number of total servings shown is approximate. Actual number of servings will depend on your preferred portion sizes.
Nutritional values shown are general guidelines and reflect information for 1 serving using the ingredients listed, not including any optional ingredients. Actual macros may vary slightly depending on specific brands and types of ingredients used.
To determine the weight of one serving, prepare the recipe as instructed. Weigh the finished recipe, then divide the weight of the finished recipe (not including the weight of the container the food is in) by the desired number of servings. Result will be the weight of one serving.
Did you make this recipe?
Please consider Pinning it!!