
Catching Up: The Tale Behind These Cookies
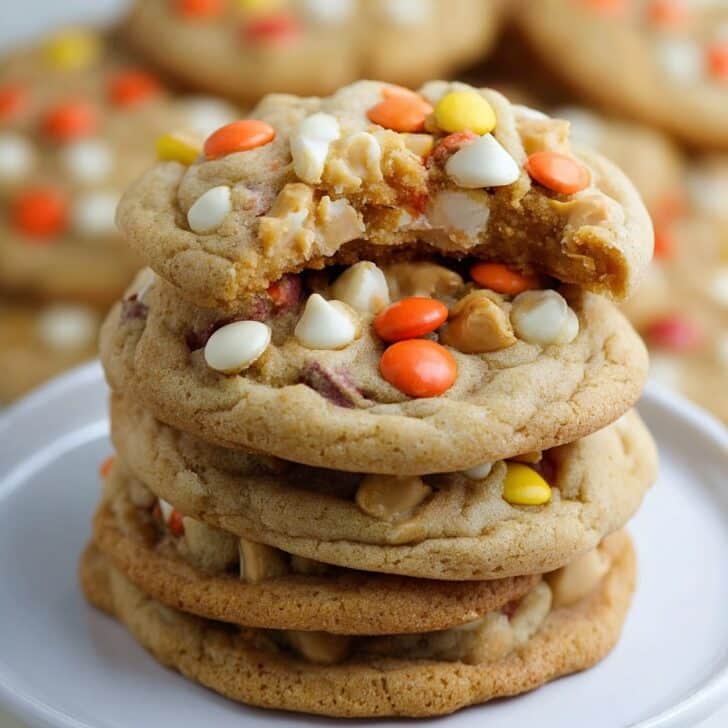
If you ever catch me baking on a rainy Saturday, odds are good I’m pulling these White Chocolate Reese’s Pieces Peanut Butter Chip Cookies from the oven. My little niece once called them “rainbow cookies” because of the colorful Reese’s Pieces, and honestly, the name just stuck—though she also once tried to sneak in Skittles, which I do NOT recommend (don’t ask). The first time I baked this, I literally doubled the batch—pure accident; I got distracted by the dog chasing his own tail. Anyway, my friends still talk about that mountain of cookies (and our sugar crash after, but let’s leave that part out).
Why You’ll Love This (Or At Least Why We Do!)
I make these when family demands something sweet but won’t agree on chocolate or peanut butter (classic sibling drama, right?). My family goes crazy for anything with Reese’s—in fact, these disappear faster than you can say “who ate the last one?” Actually, if you’ve ever fussed with fancy cookies that require chilling and endless patience, you’ll like how forgiving these are—seriously, even if you forget an ingredient, they’re still pretty dang good. And they’re colorful, so even the pickiest kid (or grumpy uncle) perks up. Pro tip: the messier you get in the kitchen, the better they seem to taste. Or maybe that’s just me.
Gather Your Ingredients (No Need to Be Too Precious)
- 2 ¼ cups all-purpose flour (sometimes I swap in a bit of whole wheat, but not too much or they get weirdly heavy)
- ½ teaspoon baking soda
- ½ teaspoon salt (okay, my grandma uses a big pinch and calls it good)
- ½ cup unsalted butter, softened (though, if salted is all you’ve got, just skip the additional salt)
- ½ cup creamy peanut butter (use chunky if you want little peanut surprises—totally optional)
- ¾ cup light brown sugar (honestly, dark brown works too if that’s what’s staring at you)
- ¼ cup granulated sugar
- 2 large eggs
- 1 teaspoon vanilla extract (imitation? Sure, no one will know but you and the bottle)
- 1 cup white chocolate chips (I sometimes use chopped white chocolate bars if I’m feeling fancy…rarely)
- 1 cup peanut butter chips
- ¾ cup Reese’s Pieces (more if you like chaos)
How to Put It All Together (My Kinda Step-by-Step)
- Preheat your oven to 350°F (175°C), unless you forgot, which I regularly do—just, y’know, try not to put dough in a cold oven.
- Grab a big bowl. Mix the flour, baking soda, and salt with a fork. Or use a whisk if you like being fancy. Set aside.
- Another bowl— beat the butter, peanut butter, and both sugars together until they’re fluffy. Or just until they look mixed; I won’t tell if you’re using a wooden spoon. (I taste a smidge here. Quality control.)
- Crack in the eggs one at a time, plus vanilla. Mix until you can’t see streaks.
- Add the dry stuff to the wet. Slowly, unless you like flour showers all over your kitchen. Actually, I find it works better if you mix in two parts so you don’t overwork the dough.
- Fold in the white chocolate, peanut butter chips, and Reese’s Pieces. Sometimes I dump in all the extras, sometimes I save a handful to poke on top before baking (they look prettier that way).
- Scoop out balls of dough, about golf ball size. Use your hands for this if you’re impatient—just wash up first if you’ve been petting your dog (learned that the hard way).
- Bake for 10-12 minutes, or until the edges are a little golden and the middles look slightly soft—don’t worry if they seem underdone; they’ll set up. If they look wonky, remember: rustic is in.
- Let them cool on the tray for a few minutes. If you try moving them too soon, well, let’s just say you might invent a cookie crumble. Not the worst thing, honestly. Then move to a rack if you remembered to get one out.
Notes: Things I Figured Out the Messy Way
- If the dough seems extra sticky, toss it in the fridge for 15 minutes—if you have the patience. But usually it’s fine.
- I once used natural peanut butter but it made the dough pretty oily; stick to classic if you can.
- Honestly, the batch size is made for sharing, but I’ve halved it whenever I’m just “quality testing.” Works just as well.
- If your chips burn a little on the tray, just pretend they’re “caramelized.” Kids don’t notice.
Experiments and Cookie Curveballs
- Tried mixing in mini marshmallows once—yeah, do NOT recommend unless you like gooey chaos.
- Chopped pretzels in the dough? Now that was a win; the salty crunch is actually awesome.
- Once, I used M&M’s instead of Reese’s Pieces, and while no one complained, it was missing that peanutty edge.
Stuff You’ll Probably Need (But Improv is Welcome)
- Large mixing bowl (or a salad bowl, done that plenty)
- Hand mixer or strong wooden spoon—stand mixer if you wanna feel like Ina Garten for a sec
- Baking sheet (lined with parchment if you’ve got it; if not, butter it good)
- Cooling rack—unless you want to use a clean grill rack (done that, still works)
- Spoon or little ice cream scoop (I use my fingers half the time, honestly)

How Long They Last (Well, In A Perfect World)
Store in an airtight container at room temp for up to 4 days, or freeze for a month. But—full disclosure—in my house they rarely make it through the next day. I once tried hiding a stash in the freezer; my husband found them anyway. Like a dessert bloodhound he is.
How We Like To Serve ‘Em
Serve ’em slightly warm, with a tall glass of milk (or oat milk—works nice, too). My nephew insists they’re best dunked. At birthday parties, I pile them on a plate and let the kids go wild. Actually, can I just say, they also make a killer ice cream sandwich if you can resist eating them all straight off the tray?
Cookie Wisdom: What I Learned The Hard Way
- Don’t skip the parchment—or you’ll be chiseling cookies off the tray. I tried, I regretted.
- Once, I used cold butter out of impatience… dough didn’t cream well. Gave me lumpy cookies. Still tasty, but not my prettiest batch.
- Overbaking? Easy to do with white chocolate, which goes brown fast—so as soon as those edges turn, pull ’em!
Cookie Questions Folks Have Actually Asked Me
- Can I freeze the dough?
- Absolutely. Roll into balls, then freeze on a tray first—then bung them in a bag. Bake straight from frozen, just tack on a couple extra minutes.
- Do I really need Reese’s Pieces?
- I mean, the magic’s in the combo, but yeah, you can swap M&Ms or even chopped up peanut butter cups if that’s what’s around. But you lose that crunchy shell bit.
- Why are mine spreading too much?
- You probably need to chill the dough, or your butter was too melty. On second thought, maybe try a little extra flour?
- Can I make these gluten-free?
- Haven’t tried it, but my friend swears by Bob’s Red Mill 1:1 flour in cookies. Might be worth a shot!
- What brands do you like for chips?
- Honestly I use whatever’s on sale, but Ghirardelli white chocolate chips are pretty dreamy. Sally’s Baking Addiction has some thoughts on chips if you wanna go down that cookie rabbit hole.
- What do you serve them with?
- Besides milk? Sometimes I make a quick hot cocoa—here’s a good hot chocolate recipe if you want a treat-y afternoon.
So there you go! Seriously, even if you muck it up a smidge, these cookies are pure nostalgia in a bite. Let me know how yours turn out (unless you use Skittles—seriously, just don’t).

Ingredients
- 2 1/4 cups all-purpose flour
- 1 teaspoon baking soda
- 1/2 teaspoon salt
- 1 cup unsalted butter, softened
- 1 cup brown sugar, packed
- 1/2 cup granulated sugar
- 2 large eggs
- 2 teaspoons vanilla extract
- 1 cup white chocolate chips
- 3/4 cup Reese’s Pieces candies
- 3/4 cup peanut butter chips
Instructions
-
1Preheat oven to 350°F (175°C). Line two baking sheets with parchment paper.
-
2In a medium bowl, whisk together the flour, baking soda, and salt.
-
3In a large bowl, cream together the butter, brown sugar, and granulated sugar until light and fluffy.
-
4Add eggs one at a time, beating well after each addition. Stir in the vanilla extract.
-
5Gradually add the dry ingredients to the wet ingredients. Fold in white chocolate chips, Reese’s Pieces, and peanut butter chips.
-
6Drop tablespoonfuls of dough onto prepared baking sheets. Bake for 10-12 minutes or until edges are golden. Cool on wire racks.
Approximate Information for One Serving
Nutrition Disclaimers
Number of total servings shown is approximate. Actual number of servings will depend on your preferred portion sizes.
Nutritional values shown are general guidelines and reflect information for 1 serving using the ingredients listed, not including any optional ingredients. Actual macros may vary slightly depending on specific brands and types of ingredients used.
To determine the weight of one serving, prepare the recipe as instructed. Weigh the finished recipe, then divide the weight of the finished recipe (not including the weight of the container the food is in) by the desired number of servings. Result will be the weight of one serving.
Did you make this recipe?
Please consider Pinning it!!