
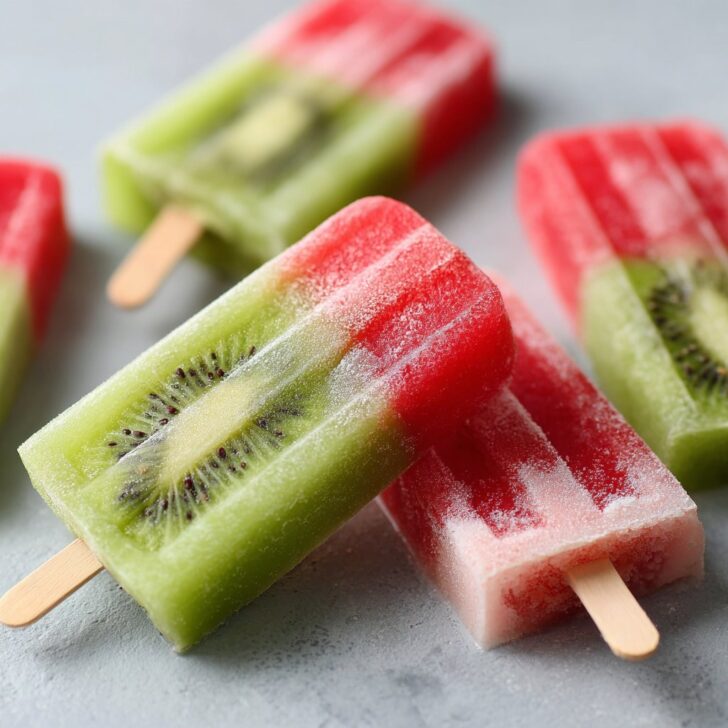

Hey y'all! If you’re looking for a vibrant, homemade treat that screams summer, these Watermelon Kiwi Popsicles are about to become your new favorite. Bursting with juicy watermelon and tangy kiwi, they're as beautiful to look at as they are delicious to eat. Whether you need a cooling snack for a backyard BBQ, a healthy dessert for the kids, or a fun treat after a sunny day, these popsicles hit the spot. Let's get cooking!
Why You'll Love This Watermelon Kiwi Popsicles Recipe
- Super refreshing and naturally hydrating—perfect for hot days.
- Made with real fruit and no artificial flavors or colors.
- Kid-friendly, vegan, and low in added sugar.
- Quick to prepare and perfect for make-ahead snacking.
- Visually striking layers impress at parties and picnics!
Ingredients for Watermelon Kiwi Popsicles
- 3 cups seedless watermelon, cubed
- 2 tablespoons honey or agave syrup (optional, to taste)
- 4 medium kiwis, peeled and sliced
- 1 tablespoon freshly squeezed lime juice
- ⅓ cup water (divided)
How to Make Watermelon Kiwi Popsicles: Step-by-Step Directions
Step 1: Blend the Watermelon Layer
Add watermelon cubes and 1 tablespoon honey (if using) to a blender. Blend until completely smooth. If needed, add up to ¼ cup water to help blend. Taste and adjust sweetness as desired.
Step 2: Fill Popsicle Molds
Pour the blended watermelon mixture into popsicle molds, filling each mold about ⅔ full. Freeze for 45 minutes, until just set but not fully frozen.
Step 3: Prepare the Kiwi Layer
While the watermelon layer is setting, blend the kiwis, remaining honey (if desired), lime juice, and 2-3 tablespoons water until smooth. (Add more water as needed for a pourable consistency.)
Step 4: Add Kiwi Layer and Freeze
Once the watermelon layer is partially frozen, gently pour the kiwi puree on top to fill the molds. Insert popsicle sticks, then freeze for at least 4 hours, or until fully set.
Step 5: Unmold and Enjoy
Run warm water over the outside of the molds for 10-15 seconds to help release the popsicles. Enjoy immediately or store for later!


Watermelon Kiwi Popsicles Recipe Notes & Helpful Tips
- For an extra-smooth texture, strain the watermelon puree to remove any pulp before freezing.
- If your popsicle sticks won't stand up straight, partially freeze the base layer before inserting them.
- Check out Serious Eats' guide to making perfect popsicles for more freezing tips.
Variations: Creative Watermelon Kiwi Popsicles Ideas
- Berry Twist: Add a layer of blended strawberries or blueberries between the watermelon and kiwi for a colorful, triple-layered treat.
- Coconut Cream: Swirl in some coconut milk for creamy, tropical popsicles.
- Minty Fresh: Blend a few fresh mint leaves into the watermelon or kiwi layer for an herbal kick.
Required Equipment for Watermelon Kiwi Popsicles
- Blender or food processor
- Popsicle molds (8-10 capacity)
- Popsicle sticks
- Measuring cups and spoons
Watermelon Kiwi Popsicles Storage & Shelf Life
Store the popsicles in the freezer for up to 2 weeks. For best results, remove them from molds and transfer to an airtight container, separating layers with parchment paper to prevent sticking.
Serving Suggestions & Perfect Pairings
- Serve on a platter of crushed ice for summer parties.
- Pair with fruit salads or a light sparkling lemonade.
- Enjoy as a post-workout refreshment or healthy afternoon snack.
Pro Tips for the Best Watermelon Kiwi Popsicles
- Use ripe, sweet watermelon and kiwis for maximum natural flavor and color.
- Freeze each layer long enough to set before adding the next to prevent blending.
- Read more about kiwi's health benefits to inspire your next fruit popsicle creation!
Watermelon Kiwi Popsicles FAQ
- Can I make these popsicles without added sweetener?
- Absolutely! If your fruit is naturally sweet, you can skip the honey or agave for a no-sugar-added treat.
- How do I prevent the layers from mixing?
- Freeze the first layer until it's just set before carefully adding the second, and pour slowly for sharp, defined layers.
- Can I use frozen fruit for Watermelon Kiwi Popsicles?
- Yes, thaw the fruit first for easier blending, and note that you may need to adjust added water for texture.
For more frozen treat inspiration, check out Bon Appétit's popsicle roundup!


Ingredients
- 3 cups seedless watermelon, cubed
- 3 kiwis, peeled and sliced
- 2 tablespoons honey or agave syrup
- 1 tablespoon fresh lime juice
- ½ cup water
- ¼ cup granulated sugar (optional, to taste)
- Pinch of salt
Instructions
-
1In a blender, combine the watermelon cubes, 1 tablespoon honey or agave syrup, ½ tablespoon lime juice, ¼ cup water, and a pinch of salt. Blend until smooth.
-
2Pour the watermelon mixture evenly into popsicle molds, filling each mold about two-thirds full. Freeze for 1 hour until slightly set.
-
3Meanwhile, blend the kiwi slices with the remaining honey or agave syrup, lime juice, and water. Add sugar if desired for extra sweetness. Blend until smooth.
-
4Remove the molds from the freezer and carefully pour the kiwi mixture over the partially frozen watermelon layer, filling to the top.
-
5Insert popsicle sticks and return the molds to the freezer. Freeze for at least 5 hours or until completely solid.
-
6To serve, run the molds under warm water for a few seconds to loosen the popsicles, then gently remove and enjoy.
Approximate Information for One Serving
Nutrition Disclaimers
Number of total servings shown is approximate. Actual number of servings will depend on your preferred portion sizes.
Nutritional values shown are general guidelines and reflect information for 1 serving using the ingredients listed, not including any optional ingredients. Actual macros may vary slightly depending on specific brands and types of ingredients used.
To determine the weight of one serving, prepare the recipe as instructed. Weigh the finished recipe, then divide the weight of the finished recipe (not including the weight of the container the food is in) by the desired number of servings. Result will be the weight of one serving.
Did you make this recipe?
Please consider Pinning it!!