

Hey y’all! If you’re looking for a breakfast that’s equal parts cozy, fluffy, and packed with autumn vibes, these Pumpkin Pancakes with Maple Syrup are just what you need. Imagine tender, golden pancakes with warm spices and real pumpkin, finished with a drizzle of rich maple syrup—perfect for lazy weekends, fall brunches, or even a festive holiday breakfast. Ready to transform your morning routine? Let’s get cooking!
Why You’ll Love This Pumpkin Pancakes with Maple Syrup Recipe
- Super fluffy and moist thanks to real pumpkin puree.
- Brimming with cozy spices for a true autumn flavor.
- Quick and easy—ready in just 25 minutes!
- A crowd-pleaser for brunches, holidays, or weekday treats.
- Perfectly pairs with crispy bacon, fruit, or your favorite coffee.
Ingredients for Pumpkin Pancakes with Maple Syrup
- 1 cup all-purpose flour
- 2 tablespoons brown sugar
- 1 teaspoon baking powder
- ½ teaspoon baking soda
- ¼ teaspoon salt
- 1 teaspoon ground cinnamon
- ½ teaspoon ground nutmeg
- ¼ teaspoon ground ginger
- 1 cup pumpkin puree (not pumpkin pie filling) [learn about pumpkin puree]
- 2 large eggs
- ¾ cup milk (dairy or non-dairy)
- 2 tablespoons melted unsalted butter (plus more for the skillet)
- 1 teaspoon vanilla extract
- Maple syrup, for serving
Directions: How to Make Pumpkin Pancakes with Maple Syrup
Step 1: Mix Dry Ingredients
In a large mixing bowl, whisk together the flour, brown sugar, baking powder, baking soda, salt, cinnamon, nutmeg, and ginger until well combined.
Step 2: Whisk Wet Ingredients
In a separate bowl, whisk together the pumpkin puree, eggs, milk, melted butter, and vanilla extract until smooth and creamy.
Step 3: Combine and Rest the Batter
Gently fold the wet mixture into the dry ingredients using a spatula. Stir until just combined—don’t overmix! Let the batter rest for 5 minutes for extra fluffiness.
Step 4: Cook the Pancakes
Heat a nonstick skillet or griddle over medium heat and brush with a little melted butter. Scoop ¼ cup of batter per pancake onto the hot skillet. Cook for 2-3 minutes, until bubbles form on the surface and the edges look set. Flip and cook another 2 minutes, until golden and cooked through. Repeat with remaining batter, adding more butter as needed.
Step 5: Serve with Maple Syrup
Stack warm pancakes on plates, drizzle generously with real maple syrup, and savor every bite!
Prep Time: 10 minutes
Cook Time: 15 minutes
Total Time: 25 minutes


Notes & Helpful Tips for Pumpkin Pancakes with Maple Syrup
- Don’t overmix the batter—lumps are okay and help your pancakes stay tender and fluffy.
- If the batter seems too thick, add a splash more milk to reach your desired consistency. [more on perfect pancake batter]
- Keep cooked pancakes warm in a 200°F (95°C) oven while you finish the batch so everyone gets a hot stack.
Variations for Pumpkin Pancakes with Maple Syrup
- Gluten-Free: Swap all-purpose flour for a gluten-free blend.
- Chocolate Chip: Fold in ½ cup mini chocolate chips for a sweet twist.
- Nutty Crunch: Add ⅓ cup chopped pecans or walnuts to the batter.
Required Equipment
- Large mixing bowl
- Medium bowl
- Whisk
- Spatula
- Nonstick skillet or griddle
- Measuring cups and spoons
- Ladle or ¼ cup scoop
Storage Instructions for Pumpkin Pancakes with Maple Syrup
Store leftover pancakes in an airtight container in the refrigerator for up to 3 days. For longer storage, freeze between sheets of parchment paper for up to 2 months. Reheat in the microwave or toaster for a quick, delicious breakfast.
Suggested Pairings & Serving Ideas
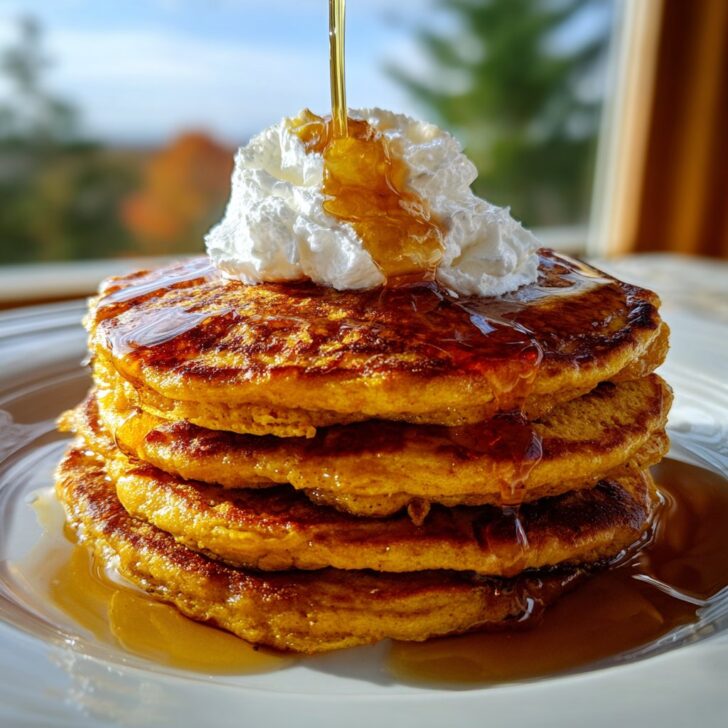
- Serve with extra maple syrup and a dollop of whipped cream.
- Top with toasted pecans and a sprinkle of cinnamon.
- Pair with crispy bacon, breakfast sausage, or a fresh fruit salad.
Pro Tips for the Best Pumpkin Pancakes with Maple Syrup
- Use pure pumpkin puree, not pumpkin pie filling, for best flavor.
- Let your batter rest to let the gluten relax—this creates fluffier pancakes. [see why resting matters]
- Preheat your skillet well before adding batter for evenly cooked, golden pancakes.
FAQ: All About Pumpkin Pancakes with Maple Syrup
- Can I use canned pumpkin puree for this recipe?
- Yes, canned pumpkin puree works perfectly—just be sure it’s 100% pure pumpkin, not pumpkin pie mix.
- How do I keep my pancakes from sticking?
- Use a nonstick skillet or griddle and brush lightly with butter between batches for easy flipping and no sticking.
- Can I make the batter ahead of time?
- While you can mix the dry and wet ingredients separately ahead, it’s best to combine them just before cooking for the fluffiest results.


Ingredients
- 1 cup all-purpose flour
- 2 tablespoons brown sugar
- 1 teaspoon baking powder
- ½ teaspoon baking soda
- ½ teaspoon ground cinnamon
- ¼ teaspoon ground nutmeg
- ¼ teaspoon salt
- ¾ cup pumpkin puree
- ¾ cup milk
- 1 large egg
- 2 tablespoons melted butter
- 1 teaspoon vanilla extract
- Maple syrup, for serving
Instructions
-
1In a large bowl, whisk together the flour, brown sugar, baking powder, baking soda, cinnamon, nutmeg, and salt.
-
2In another bowl, combine the pumpkin puree, milk, egg, melted butter, and vanilla extract. Mix until smooth.
-
3Pour the wet ingredients into the dry ingredients and stir until just combined. Do not overmix; some lumps are okay.
-
4Heat a non-stick skillet or griddle over medium heat and lightly grease with butter or oil.
-
5Pour ¼ cup of batter for each pancake onto the skillet. Cook until bubbles form on the surface and the edges look set, about 2-3 minutes. Flip and cook for another 2 minutes until golden brown.
-
6Serve warm pancakes stacked and drizzled generously with maple syrup.
Approximate Information for One Serving
Nutrition Disclaimers
Number of total servings shown is approximate. Actual number of servings will depend on your preferred portion sizes.
Nutritional values shown are general guidelines and reflect information for 1 serving using the ingredients listed, not including any optional ingredients. Actual macros may vary slightly depending on specific brands and types of ingredients used.
To determine the weight of one serving, prepare the recipe as instructed. Weigh the finished recipe, then divide the weight of the finished recipe (not including the weight of the container the food is in) by the desired number of servings. Result will be the weight of one serving.
Did you make this recipe?
Please consider Pinning it!!