
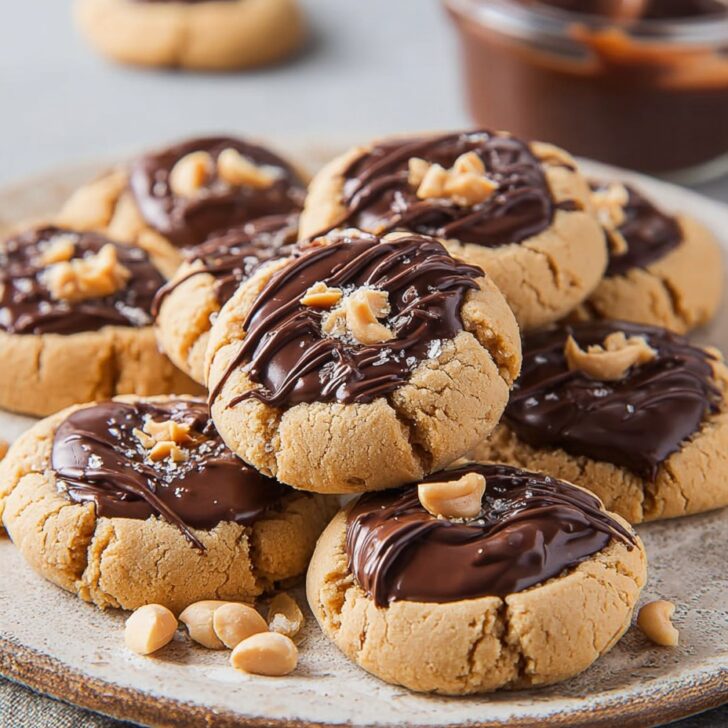
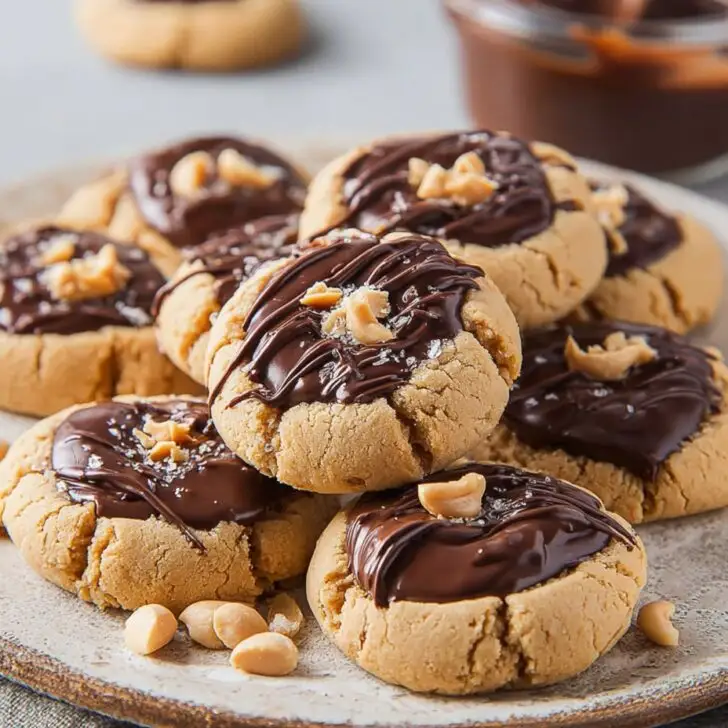
If you’ve ever found yourself wandering the kitchen late at night, hungry for something sweet and a little nostalgic, let me tell you—these Peanut Butter Chocolate Thumbprint Cookies have been there for me more than once. My cousin Luke once called them my “peace treaty cookies” after a heated Monopoly game (it worked, by the way). They’re the soft, chewy, chocolatey treat I make when I want my house to instantly smell like the holidays or just… not like yesterday’s dinner. Also, I’ll admit there’s something ridiculously satisfying about literally pressing your thumb into the middle of each cookie. If you’ve had a long day, it feels just right.
Why You'll Love This One (Or: How My Family Keeps Pilfering the Cookie Jar)
I’ll make a batch of these on a Friday evening when I need a pick-me-up (or if I’m bribing my kids to do chores... which, don’t judge me, totally works). The combo of peanut butter and chocolate is just classic—sometimes I’ll eat one warm with cold milk and suddenly everything feels a bit less bonkers, you know? My family practically stampedes for these, and if I’m not vigilant, I’ll turn around and the cooling rack will be empty (and, wow, I still haven’t figured out the ‘invisible cookie thief’ but I have my suspicions). Also: My old frustration was cookies that bake up weirdly flat; these always come out a nice, happy little dome.
What You’ll Need (Substitutions & My Grandma’s Never-Fail Pick)
- 1 cup creamy peanut butter – I use whatever’s lurking in the pantry (Grandma swore by Jif, but I’ll grab a store brand nine times out of ten)
- ½ cup unsalted butter, softened – Honestly, salted butter works in a pinch, just skip the extra salt later
- ½ cup brown sugar (light or dark, I’m not fussy)
- ½ cup granulated sugar
- 1 large egg
- 2 teaspoon vanilla extract – The good stuff if you have it, but I won’t judge if you use the imitation kind
- 1 ½ cups all-purpose flour (I’ve used whole wheat flour once and they’re… fine, just a bit more breakfasty)
- ½ teaspoon baking soda
- ¼ teaspoon salt (skip if you used salted butter)
- ~¾ cup semisweet chocolate chips or melting wafers (I’ve totally chopped up a candy bar when desperate; works just fine!)
How To Pull These Off (Plus: A Confession or Two)
- Preheat the oven to 350°F (about 180°C). Line 2 baking sheets with parchment paper. I usually have to rip the parchment twice—the first time it’s always way too big.
- Grab a bowl (no fancy mixer needed, but it helps) and beat together the peanut butter, butter, brown sugar, and granulated sugar until fluffy. If mixing by hand, brace yourself, it’s a little arm workout.
- Add in the egg and vanilla. Mix until it looks gorgeous and smooth—if you’re like me, this is the point you sneak a spoonful and tell yourself it’s just “quality control.”
- Whisk together your flour, baking soda, and salt in a separate bowl. Then add these dry ingredients into the peanut butter mixture, folding it all together. Don’t panic if the dough seems thick or a bit crumbly—it should, honestly.
- Scoop out walnut-sized balls and plop them onto the baking sheet, leaving a decent gap between each. I roll them in my palms first but if you don’t want to get your hands messy, just use a spoon (I always end up licking my fingers anyway).
- Here’s the fun bit: Press your thumb—gently!—right into the center of each dough ball to form a little well. Sometimes I use the back of a teaspoon instead; works just as well and keeps my thumbprint-free if I'm feeling fancy.
- Bake for 10–12 minutes. They’ll look a tad pale but don’t crank the oven higher—if you do, you get crunchy cookies and, well, that wasn’t the vibe.
- Let them cool for a few mins (they’re soft) before moving to a wire rack. While they’re still warm, pop a handful of chocolate chips or a chunk of melting wafer into each thumbprint. The heat should melt the chocolate a bit, so you can swirl it with a toothpick if you want. Or just leave it—up to you.
Side note: Every third batch, I get impatient and move them off the tray too soon, and a couple end up a bit lopsided but—eh, they still taste awesome.
Notes From My Cookie Experiments
- If your dough is too sticky, a tiny shake of extra flour does the trick. But don’t overdo it; you’ll end up with dry cookies (I learned this the hard way).
- Actually, I find it works better if you let the dough chill for about 10 minutes in the fridge before shaping—especially if your kitchen is blazing hot.
- Natural peanut butter sometimes makes the dough a bit oily; regular works best for me, but if it’s what you have, just go with it.
Variations I’ve Tried (and One Flop)
- I swapped in almond butter once—totally different vibe, but still delicious. Sunflower butter is interesting; it does taste slightly earthier, but maybe that’s just me.
- Rolled the dough balls in sugar before baking—gives it a fair doughnut effect.
- I once used white chocolate for the centers. You’d think it’d be great, but I think it ended up too sweet for me. Maybe you’ll love it, I dunno!
Helpful Equipment, or Use What You Got
- Stand mixer or hand mixer makes life easy—but stirring with a sturdy wooden spoon totally works (just takes longer, and you might work up a sweat!)
- Baking sheets and parchment paper—though sometimes I just use a well-greased pan and cross my fingers. Not ideal, but you gotta improvise sometimes.
- Wire rack for cooling. Honestly, I used to just spread out a clean dish towel on the counter, and that’s worked fine in a pinch.


Storing These (Or: Why I Rarely Need to Worry)
If you do manage to have leftovers, these keep in an airtight container at room temp for about 4 days—but in my house, it never lasts more than a day! If you stack them, slip a bit of wax paper between layers so the chocolate doesn’t smudge everywhere. Refrigerating them is fine too but, in my totally subjective opinion, room temp just tastes best.
How We Serve Them (Family Fights Optional)
Honestly, I love these best with a big glass of milk (or coffee at breakfast… not sorry). I’ve even crumbled some over vanilla ice cream and, let me tell you, it’s at least three times fancier than what you’d expect. Sometimes, I’ll sneak one into my kid’s lunchbox as a little edible love note.
Lessons Learned: Little Cookie Truths
- Don’t try to shortcut the creaming step—you want that fluffy texture, so take the extra two minutes. I tried to rush it once; never again.
- Be a bit gentle when you press the centers—if you go Hulk on them, the dough cracks too much (speaking from, uh, experience).
- Oh—and don’t microwave the chocolate chips too long for the centers! I left them in a smidge too long last time and let’s just say it did NOT look appetizing.
Cookie Questions People Actually Ask Me
- Do I have to use peanut butter, or can I use something else?
Totally! Almond butter, sunflower, or even cashew butter all work. Each gives a slightly different taste; kind of fun to switch it up (though the classic peanut combo wins it for me most days). - Help! My cookies are dry. Why?
Probably too much flour or overbaking. Next time, try pulling them out of the oven when they're just barely golden at the edges. And maybe measure flour by spooning it into the cup—works better than scooping right form the bag. - How do I melt the chocolate just right?
I just pop the chocolate chips into the thumbprints while the cookies are warm and let the residual heat do its thing. But if you want it super smooth, try melting chocolate gently over a double boiler (here’s a guide I used from Sally’s Baking Addiction—her photos are super helpful). - Can I freeze these?
Yep! Freeze once cooled in a single layer, then transfer to a bag. They thaw in 30 minutes or so, perfect for last-minute cravings. - Do I really need a wire rack?
It helps, but honestly I’ve stacked ‘em on a plate plenty of times. The bottoms just lose their crisp (if that's a thing you care about!) - Have you ever doubled the recipe?
Yep, and it works fine—except I once lost count of how many eggs. I think it turned out better with two, but I’d say go for three if you’re making a double batch. Online, King Arthur Baking’s tips for scaling up cookies are helpful: King Arthur’s guide.
That’s everything I know (so far) about Peanut Butter Chocolate Thumbprint Cookies. If you have a wild experiment or improvement, drop me a line—I’m always curious about what’s cooking in other people’s kitchens.


Ingredients
- 1 cup creamy peanut butter
- ½ cup unsalted butter, softened
- 1 cup granulated sugar
- ½ cup brown sugar, packed
- 1 large egg
- 1 ½ cups all-purpose flour
- ¾ teaspoon baking soda
- ¼ teaspoon salt
- 24 chocolate kisses or chocolate drops
Instructions
-
1Preheat the oven to 350°F (175°C) and line two baking sheets with parchment paper.
-
2In a large bowl, cream together peanut butter, softened butter, granulated sugar, and brown sugar until light and fluffy.
-
3Beat in the egg until well combined.
-
4In a separate bowl, whisk together flour, baking soda, and salt. Gradually add the dry ingredients to the wet mixture, mixing just until incorporated.
-
5Roll dough into 1-inch balls and place them about 2 inches apart on prepared baking sheets. Use your thumb or the back of a teaspoon to press an indentation into the center of each ball.
-
6Bake for 10-12 minutes until edges are lightly golden. Remove from oven and immediately press a chocolate kiss or drop into the center of each cookie. Allow to cool on the baking sheet for 5 minutes before transferring to a wire rack to cool completely.
Approximate Information for One Serving
Nutrition Disclaimers
Number of total servings shown is approximate. Actual number of servings will depend on your preferred portion sizes.
Nutritional values shown are general guidelines and reflect information for 1 serving using the ingredients listed, not including any optional ingredients. Actual macros may vary slightly depending on specific brands and types of ingredients used.
To determine the weight of one serving, prepare the recipe as instructed. Weigh the finished recipe, then divide the weight of the finished recipe (not including the weight of the container the food is in) by the desired number of servings. Result will be the weight of one serving.
Did you make this recipe?
Please consider Pinning it!!