
Hey y’all! If you love creamy, decadent treats that are as easy to make as they are delicious, you’re going to swoon over these No-Bake Peanut Butter Cheesecake Balls. Packed with rich peanut butter flavor and a luscious cheesecake texture, these little bites are perfect for parties, holiday trays, or just a quick sweet fix when those cravings hit. No oven needed and ready in a flash—what’s not to love? Let’s get cooking!
Why You’ll Love This No-Bake Peanut Butter Cheesecake Balls Recipe
- No baking required—perfect for hot days or when you need a quick dessert.
- Creamy, rich, and packed with peanut butter and cheesecake flavor in every bite.
- Great for parties, holidays, potlucks, or satisfying a late-night sweet tooth.
- Customizable with your favorite toppings—chocolate drizzle, sprinkles, or nuts!
- Quick to prepare, with minimal cleanup and only a handful of ingredients.
Ingredients for No-Bake Peanut Butter Cheesecake Balls
- 8 oz (225g) cream cheese, softened
- 1 cup (240g) creamy peanut butter
- 1 cup (120g) powdered sugar, sifted
- 1 teaspoon pure vanilla extract
- ½ cup (60g) graham cracker crumbs
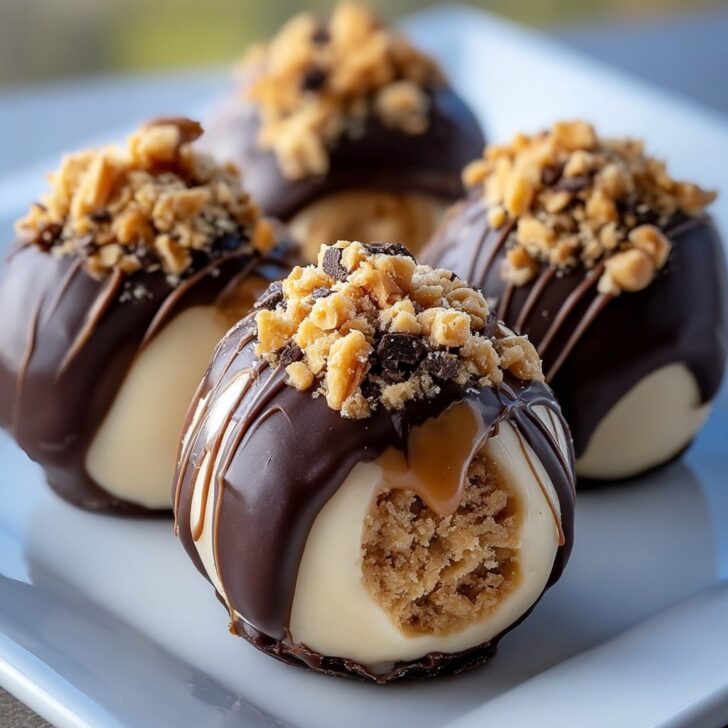
- 1 cup (175g) semi-sweet chocolate chips (for coating, optional)
- 1 tablespoon coconut oil or vegetable shortening (for coating, optional)
How to Make No-Bake Peanut Butter Cheesecake Balls
Step 1: Combine Cream Cheese and Peanut Butter
In a large mixing bowl, beat together the softened cream cheese and peanut butter with an electric mixer on medium speed until the mixture is creamy and well-blended.
Step 2: Sweeten and Flavor
Add the sifted powdered sugar and vanilla extract. Beat until smooth and fluffy. Fold in the graham cracker crumbs to help bind and add texture.
Step 3: Shape the Balls
Line a baking sheet with parchment paper. Using a small cookie scoop or spoon, portion out the mixture and roll into 1-inch balls. Place onto the tray. You should get about 20-24 balls, depending on size.
Step 4: Chill the Cheesecake Balls
Refrigerate the peanut butter cheesecake balls for at least 1 hour, or until firm enough to handle for dipping.
Step 5: Coat with Chocolate (Optional)
In a microwave-safe bowl, melt the chocolate chips with the coconut oil in 30-second increments, stirring between each, until smooth. Dip each ball into the melted chocolate, using a fork or toothpick, and return to the lined tray. Chill for an additional 15-20 minutes to set the chocolate.

Notes for Perfect No-Bake Peanut Butter Cheesecake Balls
- For best results, use full-fat cream cheese for a richer texture (learn about cream cheese varieties).
- If you want a crunchier texture, fold in ¼ cup chopped roasted peanuts to the mixture before rolling.
- Let the mixture chill longer if it feels too soft to work with—chilling makes shaping and coating easier (no-bake dessert tips from Sally’s Baking Addiction).
Variations: Make Your Own No-Bake Peanut Butter Cheesecake Balls Unique!
- White Chocolate Drizzle: Replace the semi-sweet chocolate with melted white chocolate for a sweet twist.
- Gluten-Free Version: Substitute gluten-free graham crackers or oat flour for a celiac-friendly option.
- Oreo Crunch: Swap in crushed Oreos instead of graham crackers for cookies-and-cream bliss.
Equipment Needed for Making No-Bake Peanut Butter Cheesecake Balls
- Electric hand mixer or stand mixer
- Mixing bowls
- Small cookie scoop or spoon
- Parchment paper
- Baking sheet
- Microwave-safe bowl (if coating in chocolate)
How to Store No-Bake Peanut Butter Cheesecake Balls
Store these cheesecake balls in an airtight container in the refrigerator for up to 1 week. You can also freeze them for up to 2 months; just thaw overnight in the fridge before serving for best texture and flavor.
Serving Suggestions & Pairings for No-Bake Peanut Butter Cheesecake Balls
- Serve chilled with a drizzle of caramel or extra melted chocolate.
- Pair with hot coffee or cold milk for a classic treat.
- Add to a dessert charcuterie board alongside fresh berries, pretzels, and other no-bake bites (see dessert board ideas on Bon Appétit).
Pro Tips for the Best No-Bake Peanut Butter Cheesecake Balls
- Use room temperature cream cheese to avoid lumps and achieve a smooth, creamy mixture.
- Chill the mixture before rolling to make handling much easier and keep your hands mess-free.
- When dipping in chocolate, tap off extra coating and let them set on parchment for a professional look (expert chocolate dipping tips).
FAQ: No-Bake Peanut Butter Cheesecake Balls
- Can I use natural peanut butter instead of regular?
- Yes, but the texture will be a bit softer—make sure it’s well-stirred and consider adding extra graham cracker crumbs if needed.
- Can I make these ahead for a party?
- Absolutely! They’re perfect for making a day or two ahead—just keep refrigerated until serving.
- Can I skip the chocolate coating?
- Definitely! They taste amazing plain or rolled in finely chopped nuts or shredded coconut if you’d like a coating-free option.
Prep Time: 20 minutes
Chill Time: 1 hour 15 minutes
Total Time: 1 hour 35 minutes
Yield: 20-24 balls

Ingredients
- 8 oz (225g) cream cheese, softened
- 3/4 cup creamy peanut butter
- 1 cup powdered sugar
- 1 tsp vanilla extract
- 1 cup graham cracker crumbs
- 1 1/2 cups semi-sweet chocolate chips
- 2 tbsp unsalted butter
- Pinch of salt
Instructions
-
1In a large mixing bowl, beat the softened cream cheese and peanut butter together until smooth and creamy.
-
2Add powdered sugar, vanilla extract, graham cracker crumbs, and a pinch of salt. Mix until well combined and a thick dough forms.
-
3Scoop tablespoon-sized portions of dough and roll them into balls. Place the balls on a parchment-lined baking sheet.
-
4Chill the cheesecake balls in the refrigerator for about 20 minutes, or until firm.
-
5In a microwave-safe bowl, melt the chocolate chips with butter in 30-second intervals, stirring until smooth.
-
6Using a fork, dip each chilled ball into the melted chocolate to coat completely. Place back on the baking sheet and refrigerate until the chocolate is set.
Approximate Information for One Serving
Nutrition Disclaimers
Number of total servings shown is approximate. Actual number of servings will depend on your preferred portion sizes.
Nutritional values shown are general guidelines and reflect information for 1 serving using the ingredients listed, not including any optional ingredients. Actual macros may vary slightly depending on specific brands and types of ingredients used.
To determine the weight of one serving, prepare the recipe as instructed. Weigh the finished recipe, then divide the weight of the finished recipe (not including the weight of the container the food is in) by the desired number of servings. Result will be the weight of one serving.
Did you make this recipe?
Please consider Pinning it!!