


Hey y'all! If you’re after a treat that’s quick, irresistibly delicious, and sure to wow at any gathering, these No-Bake Biscoff Cookie Bars are about to become your new favorite dessert. With layers of spiced cookie butter, a touch of white chocolate, and that signature Biscoff crunch, this no-bake recipe is perfect for potlucks, after-school snacks, or when you simply need a sweet fix in a hurry. Let’s get cooking!
Why You'll Love This No-Bake Biscoff Cookie Bars Recipe
- Super quick to make—ready in under 30 minutes plus chilling time.
- No oven required, making it ideal for hot days or busy kitchens.
- Combines creamy, crunchy, and spiced flavors for ultimate satisfaction.
- Perfect for parties, gifting, or a cozy night in.
- Easily customizable with mix-ins and toppings.
Ingredients for No-Bake Biscoff Cookie Bars
- 2 cups Biscoff cookies (about 28 cookies), crushed
- 1 cup Biscoff spread (cookie butter)
- ½ cup unsalted butter, melted
- ¼ cup light brown sugar, packed
- ½ teaspoon pure vanilla extract
- ¼ teaspoon sea salt
- 1 cup white chocolate chips
- 2 tablespoons Biscoff spread (for drizzle, optional)
- Extra crushed Biscoff cookies (for topping, optional)
How to Make No-Bake Biscoff Cookie Bars
Step 1: Prepare the Pan
Line an 8x8-inch square pan with parchment paper, leaving an overhang for easy lifting later. Lightly spray with non-stick spray.
Step 2: Make the Biscoff Base
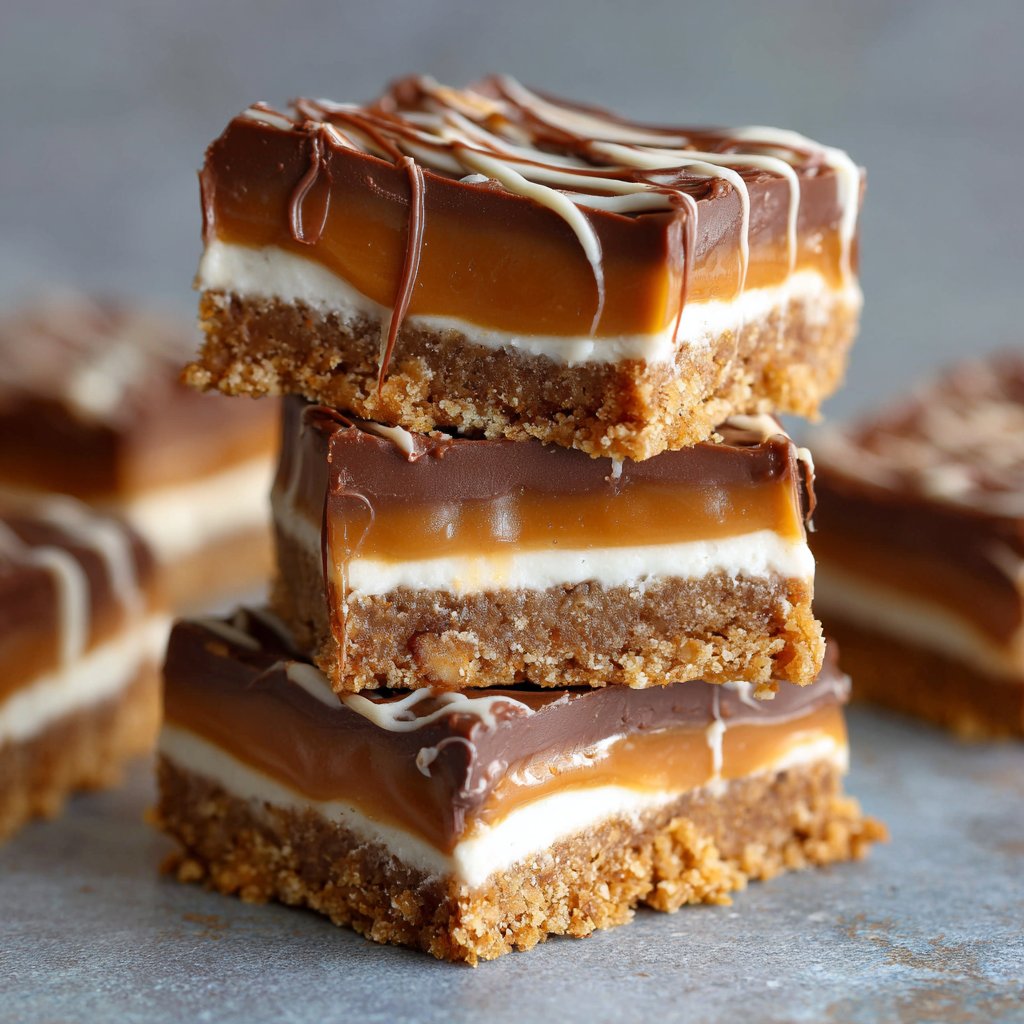
In a large bowl, combine crushed Biscoff cookies, melted butter, brown sugar, vanilla extract, salt, and 1 cup Biscoff spread. Stir until the mixture is thick and well combined—everything should look like moist, sandy dough.
Step 3: Press and Chill
Press the mixture firmly and evenly into the prepared pan using the back of a spoon or your hands. Refrigerate for at least 30 minutes, or until set.
Step 4: Add the White Chocolate Layer
Melt white chocolate chips in a microwave-safe bowl in 20-second bursts, stirring between each, until smooth. Pour over the chilled Biscoff base and spread evenly.
Step 5: Decorate and Finish
Microwave the extra 2 tablespoons Biscoff spread for 10 seconds to soften, then drizzle over the white chocolate layer. Sprinkle with extra crushed Biscoff cookies if desired. Refrigerate for another 20-30 minutes until fully set.

Step 6: Slice and Serve
Lift the bars from the pan using parchment edges. Slice into 16 squares. Enjoy!
Notes for the Best No-Bake Biscoff Cookie Bars
- Use a food processor for evenly crushed cookies, or seal them in a zip-top bag and crush with a rolling pin (see technique).
- Let the bars come to room temperature for 5-10 minutes before slicing for cleaner cuts.
- If white chocolate is too thick to spread, add 1 teaspoon coconut oil to melt smoothly (learn more).
Variations for No-Bake Biscoff Cookie Bars
- Chocolate Lovers: Swap white chocolate for dark or milk chocolate topping.
- Nutty Crunch: Mix in ½ cup chopped toasted almonds or pecans into the base.
- Vegan Version: Use plant-based butter and dairy-free white chocolate chips.
Required Equipment for No-Bake Biscoff Cookie Bars
- 8x8-inch square baking pan
- Parchment paper
- Mixing bowls (microwave-safe)
- Spatula or spoon
- Microwave or stovetop for melting chocolate
- Food processor or rolling pin (for crushing cookies)
Storage Instructions for No-Bake Biscoff Cookie Bars
Store bars in an airtight container in the refrigerator for up to 1 week. For longer storage, freeze bars (layered with parchment between them) for up to 2 months. Thaw overnight in the fridge before serving.
Pairings & Serving Recommendations for No-Bake Biscoff Cookie Bars
- Serve with hot coffee or chai tea for a cozy snack.
- Pair with a scoop of vanilla ice cream for an indulgent dessert.
- Enjoy alongside fresh fruit like strawberries or raspberries for a tangy contrast.
Pro Tips for Perfect No-Bake Biscoff Cookie Bars
- Pack the base firmly for bars that hold their shape—use a flat-bottomed glass for even pressure (more no-bake tips).
- Chill bars thoroughly before cutting to prevent the layers from smudging.
- For neat slices, dip your knife in hot water and wipe clean between cuts.
FAQ – No-Bake Biscoff Cookie Bars
- Can I use other cookie butter brands?
- Yes! Any creamy cookie butter spread works well, though Biscoff has a unique flavor.
- Can these bars sit out at room temperature?
- They’re best chilled, but can sit out for 1-2 hours at cool room temperature. In hot weather, keep them refrigerated.
- Can I double the recipe?
- Absolutely! Use a 9x13-inch pan and double all ingredients for a crowd.

Ingredients
- 2 cups Biscoff cookies, crushed
- ½ cup unsalted butter, melted
- 1 cup Biscoff spread
- ½ cup powdered sugar
- ½ teaspoon vanilla extract
- ¼ teaspoon salt
- ½ cup white chocolate chips, melted
- ¼ cup Biscoff cookies, roughly chopped (for topping)
Instructions
-
1Line an 8x8-inch baking pan with parchment paper, leaving an overhang for easy removal.
-
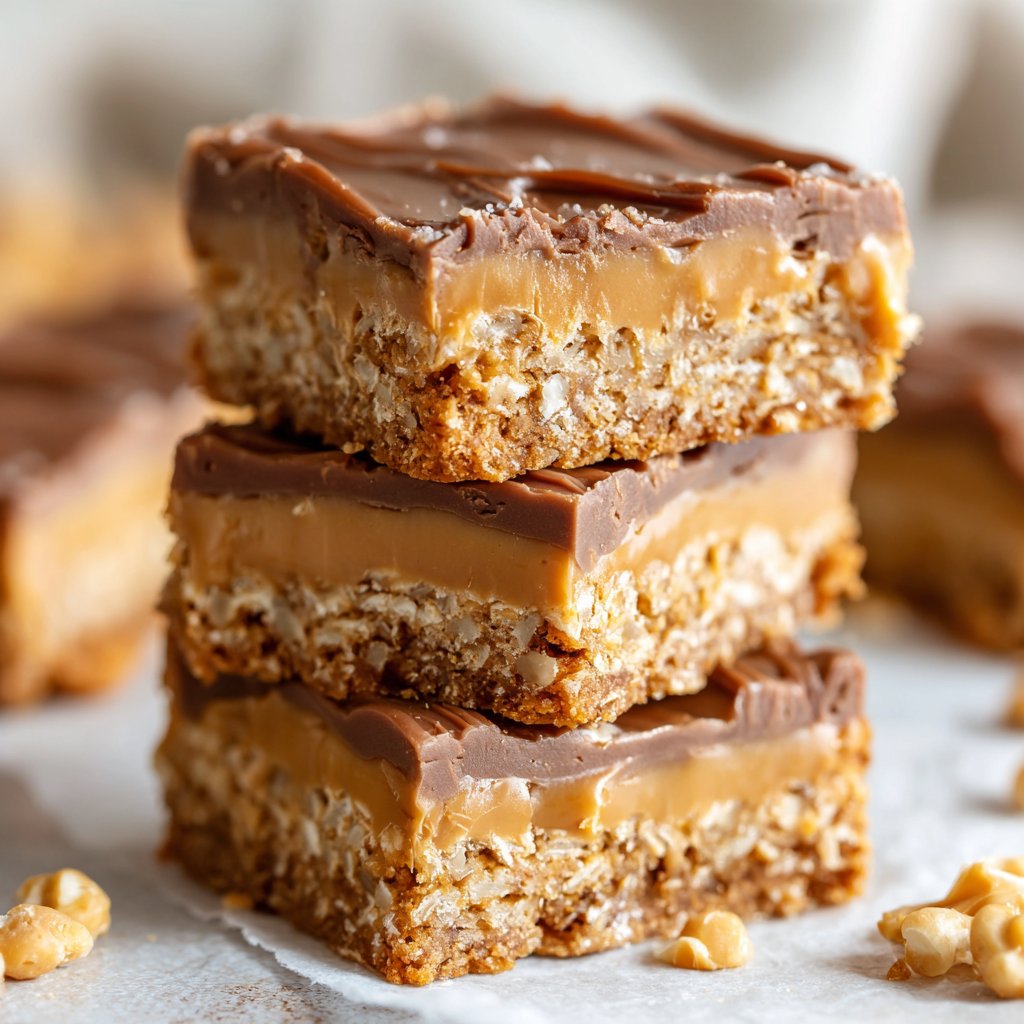
2In a medium bowl, combine the crushed Biscoff cookies and melted butter. Mix until the crumbs are evenly coated.
-
3Press the cookie mixture firmly into the bottom of the prepared pan to form an even base.
-
4In another bowl, mix together the Biscoff spread, powdered sugar, vanilla extract, and salt until smooth. Spread this mixture evenly over the cookie base.
-
5Drizzle the melted white chocolate over the top and sprinkle with the roughly chopped Biscoff cookies.
-
6Refrigerate for at least 1 hour or until set. Lift out of the pan using the parchment, slice into bars, and serve.
Approximate Information for One Serving
Nutrition Disclaimers
Number of total servings shown is approximate. Actual number of servings will depend on your preferred portion sizes.
Nutritional values shown are general guidelines and reflect information for 1 serving using the ingredients listed, not including any optional ingredients. Actual macros may vary slightly depending on specific brands and types of ingredients used.
To determine the weight of one serving, prepare the recipe as instructed. Weigh the finished recipe, then divide the weight of the finished recipe (not including the weight of the container the food is in) by the desired number of servings. Result will be the weight of one serving.
Did you make this recipe?
Please consider Pinning it!!