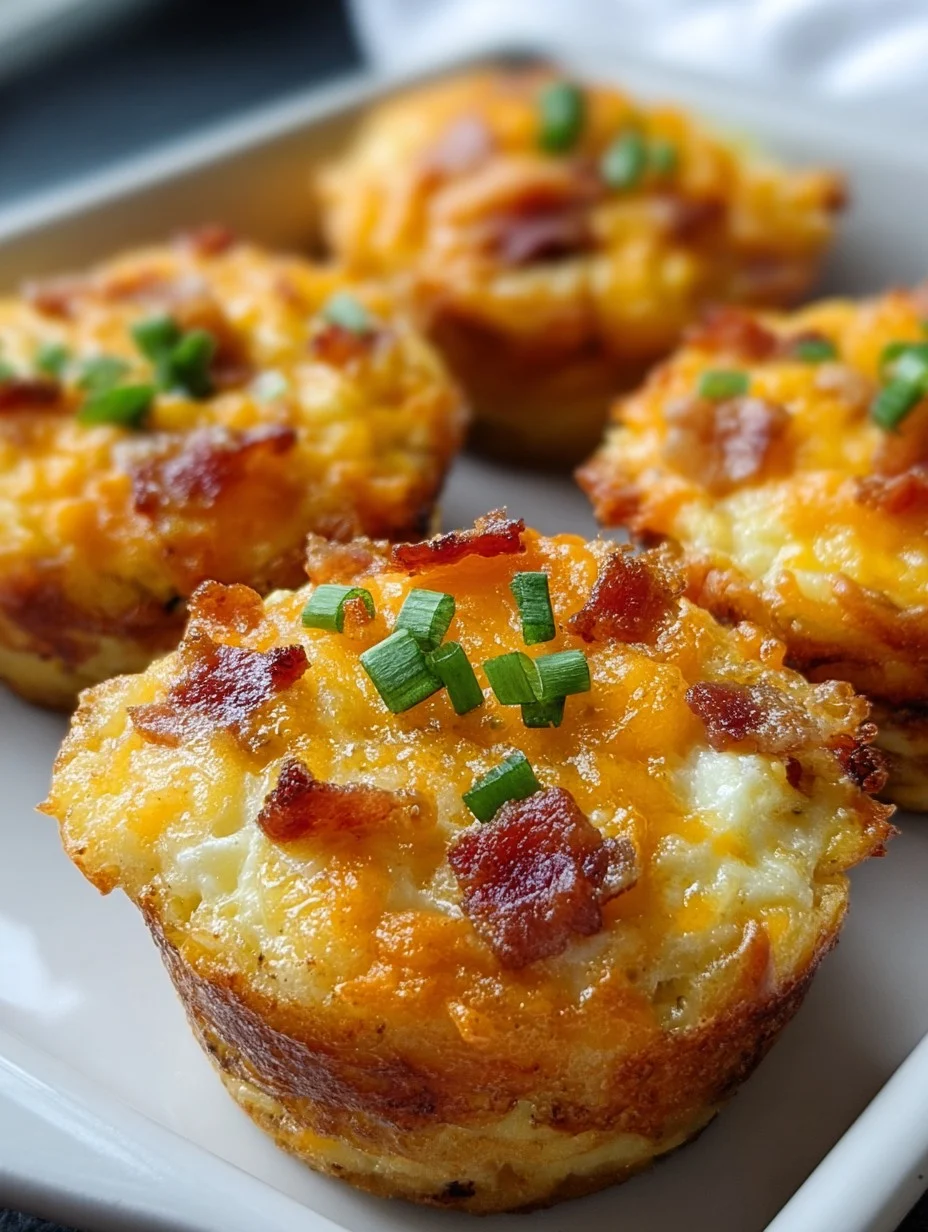
Kicking Things Off – Or, Why I Will Never Host Brunch Without These Again
Alright, story time: The first time I made loaded bacon and egg hash brown muffins, it was pure panic. My mother-in-law (think: the bake-off champion of Lancashire) was coming over for brunch. Oven acting wonky, bacon sizzling everywhere, my dog eyeing the grated potatoes like forbidden treasure. Chaos, mate. But guess what? Folks inhaled these little hash brown muffin beauties so fast, I barely grabbed one for myself. Ever since, these quirky little brunch muffins are my go-to for family gatherings or when I want breakfast that eats like a big hug. And, yeah, someone always asks for the recipe with that face that says they think it’s a real secret.
Why You'll Love Making These (My Family's Hash Brown Muffin Obsession)
I make these whenever I get that “What am I even supposed to do with all these eggs?” feeling (hello, backyard chickens). Seriously, my partner practically does a jig when bacon and hash browns join forces—because honestly, what could be bad if it starts with crispy potatoes and ends with melty cheese? Sometimes my kid tries to pick out all the green onion, which is a losing battle, but the muffins vanish all the same. And hey, if you sometimes worry about things not coming out Instagram-perfect—these are meant to be rustic. The messier, the better! (And cleaning the muffin tin...well, pour yourself a cuppa, it'll be alright.)
What You'll Need (and Some Cheat Codes)
- 3 cups shredded hash browns (frozen’s fine—my gran swore by grating fresh spuds, but honestly, whatever’s on hand: all good)
- 1 cup cooked bacon, crumbled (I’ve used those pre-cooked bits in a pinch, don’t tell gran)
- ¾ cup shredded cheddar cheese (pepper jack is wild, just saying)
- 6 large eggs (5 if you like them denser, 7 if you’re clumsy with shells—no shame)
- ¼ cup milk (I’ve been known to use cream, or that last bit of Greek yogurt, to no ill effect)
- ¼ cup diced green onion (chives work, or leave them out if someone dramatic hates onions)
- Salt and pepper to taste (or throw in some smoked paprika if you’re feeling posh)
- Butter or spray for greasing (or live on the wild side, don’t grease—just kidding, don’t do that)
Here's How I Throw it All Together
- Preheat your oven to 400°F (about 200°C). Grease up that muffin tin like your life depends on it (because the hash browns love to stick—personal nemesis).
- Toss the shredded hash browns with a handful of cheese, half the bacon, pinch of salt and pepper. I use my hands for this; gloves optional but it gets messy.
- Spoon this mix into each muffin cup—think a hefty tablespoon or so. Press down and use the back of your spoon to smoosh it up the sides. (Looks weird? Perfect.)
- Bake the bases 15-20 min; you want 'em lightly crisp but not hard enough to launch across the kitchen. I've overbaked at this stage, and they're still edible, just...crunchy.
- Meanwhile, whisk eggs, milk, rest of the cheese, and all but a sprinkle of green onion. Add any wild seasonings if it’s just you eating (cayenne, maybe?).
- Once the hash brown shells are golden, pour in the egg mix, then sprinkle on the remaining bacon and any extra cheese.
- Bake another 13-17 minutes, until they're puffy and just set. I tap the pan (gently—lesson learned) to see if they're jiggly in the middle. Let ‘em cool a few before digging in. Or don't. I never wait long.
Notes from My Many, Many Attempts (Some Eaten, Some Not)
- You don't have to defrost frozen hash browns but sometimes they’re waterlogged. Quick zap in the microwave, then squeeze dry. Actually, I find it works better if you press them out in a tea towel, but I’ve been lazy.
- If the muffins stick, “sacrifice” the worst-looking one with a fork run round the edge. On second thought, sometimes letting them cool a bit more does the trick.
- Add-ins are fair game. I've chucked spinach and bell peppers in on a health kick. It worked. Broccoli, less so—turned odd.
Swaps, Goofs, and Variations
- Veggie Version? Try mushrooms and cherry tomatoes instead of bacon. Tastes great, but the tomatoes made them a tad watery for me.
- Low carb mood? I attempted grated cauliflower instead of potatoes. Tasty! But, well, soggy bottoms. Prue Leith would not approve.
- Spiced Up: Jalapeno slices on top for an extra kick—my brother calls these the “wake me up” muffins.
- Once (key word) I tried crumbling feta in. Bit odd with hash browns, but live and learn.
Equipment Stuff – Or, My Ever-Loyal Muffin Tin
You’ll need a 12-cup muffin tin, honestly the only thing I can’t fudge here (I suppose ramekins work, just takes longer). If you're desperate, you could try a silicone cupcake tray—I did once, and it peeled fine, though it looked...let’s say "abstract." Oh, and a cheese grater or food processor for those who like to be fancy with fresh potatoes (this one from Serious Eats is a workhorse, by the way).

How I (Try to) Store Them
If you do have leftovers, chuck 'em in an airtight container. They'll last about two days in the fridge. Though honestly, in my house, it never lasts more than a day! Sometimes I actually think these taste better warmed up the next morning. Reheat in the oven at 350°F for 10 min or just microwave, though the latter makes them a bit (okay, a lot) less crispy.
How I Like to Serve These (Or: My Family’s Version of Brunch)
First off, Sunday mornings it’s these muffins, massive mugs of coffee, and a heap of fruit. If I’m feeling extra, I’ll serve with a swirl of green goddess sauce—super tangy, super yum. My uncle dunks his in ketchup, which is classic (if a bit boring). For potluck situations, toss in a paper liner and they pack up like a dream.
Pro Tips (AKA: Don’t Be Me)
- I once tried rushing the first bake—big mistake, ended up with mushy bottoms. Patience is the secret sauce here.
- If you get distracted and forget the cheese layer (guilty), the muffins taste fine just less gooey. No drama.
- Cleanup’s easier if you soak that tin right away. Otherwise, you may need a jackhammer—or one of those scrapers from King Arthur Baking.
FAQ (Folks Actually Ask Me These!)
- Can you freeze these hash brown muffins?
- Sort of! They become a bit soft once you defrost them, but wrapped tight, they’ll keep a month or so. I’ve microwaved them from frozen in a pinch—came out tasting surprisingly alright.
- Do I have to use bacon?
- You don’t, honestly! Ham works, or if you’re not into pork, try turkey bacon. Or skip it entirely, as I sometimes do when I’m broke or not in the mood for a meat run.
- How do I stop them sticking?
- Super generous greasing, or parchment muffin liners (the tall ruffly ones). Mine sometimes stick anyway, but a plastic knife run around the edge fixes it. No biggie.
- Any way to make these ahead?
- You can bake them the night before and reheat in the oven; they’re not quite as crisp but still yum. I think the mix is best baked fresh, though.
- Can kids help make these?
- Definitely! Let them squish the hash browns into tins (mess alert), or whisk eggs. Just keep everyone back when the pan’s hot, yeah?
If you try these loaded bacon and egg hash brown muffins, let me know how it all shakes out. Drop a comment, or just send good vibes—I take either. And if you come up with a version that really wows, I wanna hear about it. Happy brunching, friend!
Ingredients
- 3 cups frozen hash browns, thawed and dried
- 6 large eggs
- 1 cup shredded cheddar cheese
- 6 slices bacon, cooked and crumbled
- ¼ cup chopped green onions
- ½ cup milk
- ½ teaspoon garlic powder
- Salt and pepper, to taste
- Nonstick cooking spray
Instructions
-
1Preheat your oven to 400°F (200°C) and grease a 12-cup muffin tin with nonstick cooking spray.
-
2In a large bowl, combine the thawed and dried hash browns, half of the shredded cheddar cheese, garlic powder, salt, and pepper.
-
3Divide the hash brown mixture evenly among the muffin cups, pressing it into the bottom and up the sides to form a crust.
-
4Bake the hash brown crusts for 12-15 minutes until starting to brown.
-
5In another bowl, whisk together eggs, milk, and half of the green onions. Stir in crumbled bacon.
-
6Pour the egg mixture evenly over the partially baked hash brown cups. Top with remaining cheese and bake for 15-18 minutes until eggs are set. Sprinkle with leftover green onions before serving.
Approximate Information for One Serving
Nutrition Disclaimers
Number of total servings shown is approximate. Actual number of servings will depend on your preferred portion sizes.
Nutritional values shown are general guidelines and reflect information for 1 serving using the ingredients listed, not including any optional ingredients. Actual macros may vary slightly depending on specific brands and types of ingredients used.
To determine the weight of one serving, prepare the recipe as instructed. Weigh the finished recipe, then divide the weight of the finished recipe (not including the weight of the container the food is in) by the desired number of servings. Result will be the weight of one serving.
Did you make this recipe?
Please consider Pinning it!!


