
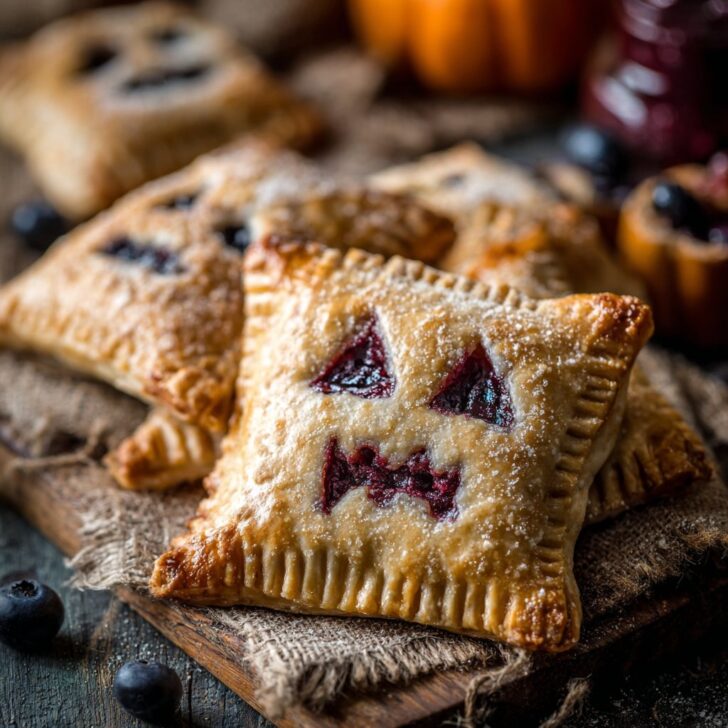

Hey y’all! If you’re looking to add a ghoulishly fun twist to your Halloween celebrations, these Halloween Blueberry Ghost Hand Pies are just what you need. With their flaky, golden crusts and sweet-tart blueberry filling, they’re both delightfully spooky and irresistibly delicious. Perfect for Halloween parties, family baking sessions, or a festive fall treat, these ghost-shaped hand pies are sure to haunt your taste buds in the best way possible. Let’s get cooking!
Why You'll Love This Halloween Blueberry Ghost Hand Pies Recipe
- Super easy and fun to make, even for kids and beginner bakers.
- Perfectly portioned, making them great for parties and gatherings.
- Flaky, buttery crust paired with juicy, sweet-tart blueberry filling.
- Customizable shapes—let your creativity run wild!
- Can be made ahead for stress-free Halloween entertaining.
Ingredients for Halloween Blueberry Ghost Hand Pies
- 2 refrigerated pie crusts (or homemade)
- 1 cup fresh or frozen blueberries
- ¼ cup granulated sugar
- 1 tablespoon cornstarch
- 1 tablespoon lemon juice
- ½ teaspoon vanilla extract
- 1 large egg (for egg wash)
- 1 tablespoon milk
- Mini chocolate chips or black decorating gel (for ghost eyes)
How to Make Halloween Blueberry Ghost Hand Pies
Step 1: Prep the Blueberry Filling
- In a medium saucepan, combine blueberries, sugar, cornstarch, lemon juice, and vanilla extract.
- Cook over medium heat, stirring frequently, until the mixture thickens and becomes jammy (about 4-5 minutes). Let cool completely.
Step 2: Cut Out Ghost Shapes
- Preheat oven to 375°F (190°C). Line a baking sheet with parchment paper.
- Roll out pie crusts on a lightly floured surface. Use a ghost-shaped cookie cutter (about 3-4 inches) to cut an even number of shapes—re-roll scraps as needed.
Step 3: Fill and Assemble the Hand Pies
- Place half the ghost shapes on the prepared baking sheet.
- Spoon 1 to 1.5 teaspoons of blueberry filling onto the center of each.
- With the remaining ghost shapes, cut out two small eye holes with a knife or piping tip.
- Place the tops over the filled bottoms. Press edges with a fork to seal.
Step 4: Add Egg Wash and Bake
- Whisk egg and milk together. Brush over the tops of the hand pies.
- Bake for 18-22 minutes or until golden brown and crisp.
Step 5: Decorate and Serve
- Let cool for 5 minutes. Add mini chocolate chips or dots of black gel for ghostly eyes.
- Serve warm or at room temperature. Enjoy!


Notes for Perfect Halloween Blueberry Ghost Hand Pies
- Ensure the blueberry filling is cooled completely to prevent soggy crusts.
- If you don’t have a ghost cookie cutter, use a knife to freehand the shape—get creative!
- For a homemade pie crust option, check out this reliable pie crust recipe.
Variations for Halloween Blueberry Ghost Hand Pies
- Strawberry Mummy Hand Pies: Swap blueberries for diced strawberries and shape as mummies.
- Apple Jack-O-Lantern Pies: Use apple pie filling and pumpkin-shaped cutters.
- Chocolate-Banana Ghosts: Fill with mashed banana and chocolate chips for a decadent twist.
Required Equipment for Halloween Blueberry Ghost Hand Pies
- Ghost-shaped cookie cutter (or small knife)
- Baking sheet
- Parchment paper
- Rolling pin
- Pastry brush
- Small saucepan
Storing Halloween Blueberry Ghost Hand Pies
Store cooled hand pies in an airtight container at room temperature for up to 2 days, or refrigerate for up to 5 days. To re-crisp, warm in a 350°F (175°C) oven for 5-7 minutes. For longer storage, freeze (wrapped tightly) for up to 2 months and thaw before reheating.
Serving Suggestions for Halloween Blueberry Ghost Hand Pies
- Serve alongside a scoop of vanilla ice cream for a spooky dessert.
- Pair with hot apple cider or homemade hot chocolate for cozy fall vibes (see recipe).
- Arrange on a festive platter for your Halloween party table.
Pro Tips for Best Halloween Blueberry Ghost Hand Pies
- Chill assembled hand pies for 10 minutes before baking to prevent spreading.
- Don’t overfill—about 1 to 1.5 teaspoons of filling works best to avoid leaks.
- Brush edges with a little water before sealing to help them stick better (more hand pie tips).
FAQs: Halloween Blueberry Ghost Hand Pies
- Can I use store-bought pie crust for Halloween Blueberry Ghost Hand Pies?
- Absolutely! Store-bought crust makes this recipe quick and easy, but homemade works great too.
- What if I don’t have a ghost cookie cutter?
- No problem—just use a small knife to cut out ghostly shapes freehand.
- Can I make these Halloween Blueberry Ghost Hand Pies ahead of time?
- Yes, you can prepare them a day in advance and store them in an airtight container until serving.
Prep Time: 20 minutes
Total Time: 45 minutes
Bake Time: 18-22 minutes


Ingredients
- 2 sheets refrigerated pie crust
- 1 cup fresh blueberries
- ¼ cup granulated sugar
- 1 tablespoon cornstarch
- 1 teaspoon lemon juice
- ½ teaspoon vanilla extract
- 1 egg (for egg wash)
- 2 tablespoons coarse sugar (for sprinkling)
Instructions
-
1Preheat the oven to 375°F (190°C) and line a baking sheet with parchment paper.
-
2In a bowl, combine blueberries, granulated sugar, cornstarch, lemon juice, and vanilla extract. Mix gently to coat the berries.
-
3Roll out the pie crusts and use a ghost-shaped cookie cutter to cut out an even number of shapes.
-
4Place half of the ghost shapes on the prepared baking sheet. Spoon a small amount of blueberry filling onto the center of each.
-
5Brush the edges with egg wash, top with remaining ghost shapes, and press edges to seal. Cut small slits for eyes and mouth.
-
6Brush tops with egg wash, sprinkle with coarse sugar, and bake for 18-20 minutes or until golden brown. Cool slightly before serving.
Approximate Information for One Serving
Nutrition Disclaimers
Number of total servings shown is approximate. Actual number of servings will depend on your preferred portion sizes.
Nutritional values shown are general guidelines and reflect information for 1 serving using the ingredients listed, not including any optional ingredients. Actual macros may vary slightly depending on specific brands and types of ingredients used.
To determine the weight of one serving, prepare the recipe as instructed. Weigh the finished recipe, then divide the weight of the finished recipe (not including the weight of the container the food is in) by the desired number of servings. Result will be the weight of one serving.
Did you make this recipe?
Please consider Pinning it!!