
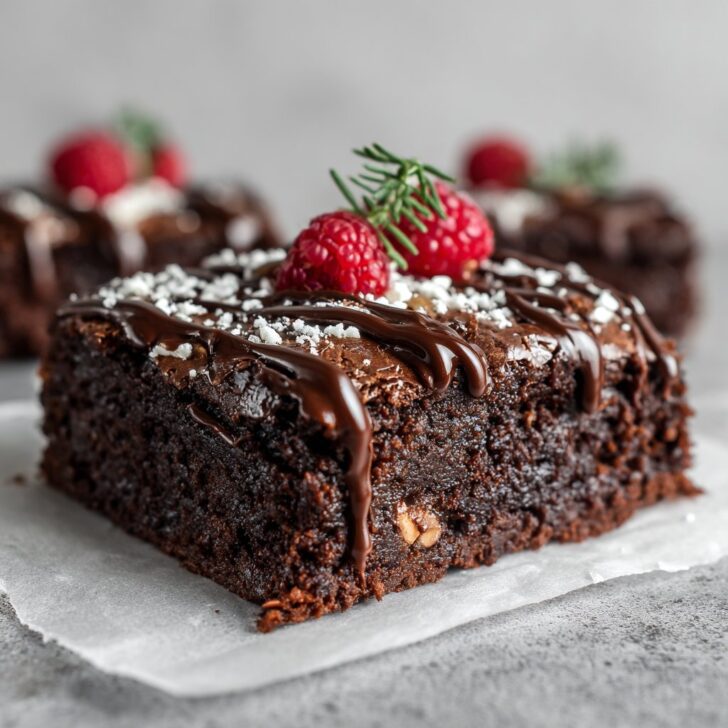

Hey y'all! If you've been craving something chocolatey yet don't want to derail your healthy habits, these Guilt-Free Chocolate Protein Brownies are about to become your new favorite treat. They're soft, fudgy, loaded with rich chocolate flavor, and sneakily packed with protein—perfect for post-workout snacks, busy mornings, or a guilt-free dessert. Let's get cooking!
Why You'll Love This Guilt-Free Chocolate Protein Brownies Recipe
- Each brownie is packed with protein, keeping you fuller for longer.
- You only need one bowl and common pantry ingredients—super easy cleanup!
- They're naturally sweetened, so you can satisfy your sweet tooth without the sugar crash.
- The rich, fudgy texture tastes truly indulgent while staying light on calories.
- Perfect for meal prep, lunchboxes, or anytime you want a healthy treat.
Ingredients for Guilt-Free Chocolate Protein Brownies
- ½ cup (120g) unsweetened applesauce
- 2 large eggs
- ¼ cup (60ml) unsweetened almond milk
- 2 teaspoons pure vanilla extract
- ½ cup (50g) chocolate protein powder (see recommendations)
- ⅓ cup (30g) unsweetened cocoa powder
- ½ cup (60g) almond flour
- ¼ cup (50g) coconut sugar or brown sugar
- ½ teaspoon baking powder
- ¼ teaspoon salt
- ¼ cup (45g) dark chocolate chips (plus extra for topping, optional)
How to Make Guilt-Free Chocolate Protein Brownies
Step 1: Preheat & Prep
Preheat your oven to 350°F (175°C). Line an 8x8-inch baking pan with parchment paper or spray with non-stick cooking spray.
Step 2: Mix Wet Ingredients
In a large mixing bowl, whisk together the applesauce, eggs, almond milk, and vanilla extract until smooth.
Step 3: Add Dry Ingredients
Add the chocolate protein powder, cocoa powder, almond flour, coconut sugar, baking powder, and salt to the bowl. Mix until just combined and no dry spots remain.
Step 4: Fold in Chocolate Chips
Gently fold in the dark chocolate chips. For extra chocolatey brownies, sprinkle a few more chips on top.
Step 5: Bake
Pour the batter into your prepared pan and smooth the top. Bake for 18-22 minutes, or until a toothpick inserted in the center comes out with just a few moist crumbs.


Step 6: Cool & Slice
Let the brownies cool in the pan for at least 15 minutes before slicing into 12 squares. Enjoy warm or at room temperature!
Notes for Guilt-Free Chocolate Protein Brownies
- For best results, use a high-quality chocolate protein powder designed for baking (find options here).
- If your batter seems too thick, add 1-2 extra tablespoons of almond milk.
- Let brownies cool completely for clean slicing and optimal fudgy texture.
Guilt-Free Chocolate Protein Brownies Variations
- Vegan: Swap eggs for flax eggs and use a plant-based protein powder.
- Nut-Free: Substitute oat flour for almond flour and use a nut-free milk.
- Mocha Brownies: Add 1 tablespoon instant coffee granules for a coffee-chocolate twist.
Required Equipment for Guilt-Free Chocolate Protein Brownies
- 8x8-inch baking pan
- Mixing bowl
- Whisk/spatula
- Measuring cups and spoons
- Parchment paper or non-stick spray
Storage Instructions for Guilt-Free Chocolate Protein Brownies
Store brownies in an airtight container at room temperature for up to 3 days, or in the refrigerator for up to 7 days. For longer storage, wrap individually and freeze for up to 2 months. Thaw at room temperature or microwave for 10-15 seconds before enjoying.
Suggested Pairings & Serving Recommendations
- Serve warm with a dollop of Greek yogurt or your favorite nut butter.
- Pair with fresh berries for a refreshing contrast.
- Enjoy with a hot cup of coffee or a glass of cold almond milk.
Pro Tips for the Best Guilt-Free Chocolate Protein Brownies
- Don't overbake—brownies continue to cook as they cool, so pull them out when the center is just set (brownie tips).
- Use parchment paper for easy removal and hassle-free cleanup.
- Let brownies rest before slicing to achieve perfect, clean edges.
Guilt-Free Chocolate Protein Brownies FAQ
- Can I use whey protein instead of plant-based?
- Yes! Whey protein works well, but the texture may be slightly lighter compared to plant-based powders.
- Can I make these brownies gluten-free?
- Absolutely—this recipe is naturally gluten-free when made with almond flour and certified gluten-free protein powder.
- How do I know when the brownies are done?
- They're ready when the edges are set and a toothpick comes out with moist crumbs, not wet batter.
Prep Time: 10 minutes
Cook Time: 20 minutes
Total Time: 30 minutes


Ingredients
- 1 cup chocolate protein powder
- ½ cup unsweetened cocoa powder
- ½ cup unsweetened applesauce
- ¼ cup almond flour
- ¼ cup honey or maple syrup
- 2 large eggs
- ¼ cup unsweetened almond milk
- ¼ cup dark chocolate chips
- 1 teaspoon vanilla extract
- ½ teaspoon baking powder
- ¼ teaspoon salt
Instructions
-
1Preheat your oven to 350°F (175°C) and line an 8x8-inch baking pan with parchment paper.
-
2In a large bowl, whisk together the chocolate protein powder, cocoa powder, almond flour, baking powder, and salt.
-
3In a separate bowl, mix the eggs, applesauce, honey (or maple syrup), almond milk, and vanilla extract until smooth.
-
4Combine the wet and dry ingredients, stirring until just mixed. Fold in the dark chocolate chips.
-
5Pour the batter into the prepared pan and spread evenly. Bake for 20 minutes or until a toothpick inserted in the center comes out mostly clean.
-
6Allow brownies to cool in the pan before slicing into 9 squares. Enjoy!
Approximate Information for One Serving
Nutrition Disclaimers
Number of total servings shown is approximate. Actual number of servings will depend on your preferred portion sizes.
Nutritional values shown are general guidelines and reflect information for 1 serving using the ingredients listed, not including any optional ingredients. Actual macros may vary slightly depending on specific brands and types of ingredients used.
To determine the weight of one serving, prepare the recipe as instructed. Weigh the finished recipe, then divide the weight of the finished recipe (not including the weight of the container the food is in) by the desired number of servings. Result will be the weight of one serving.
Did you make this recipe?
Please consider Pinning it!!