
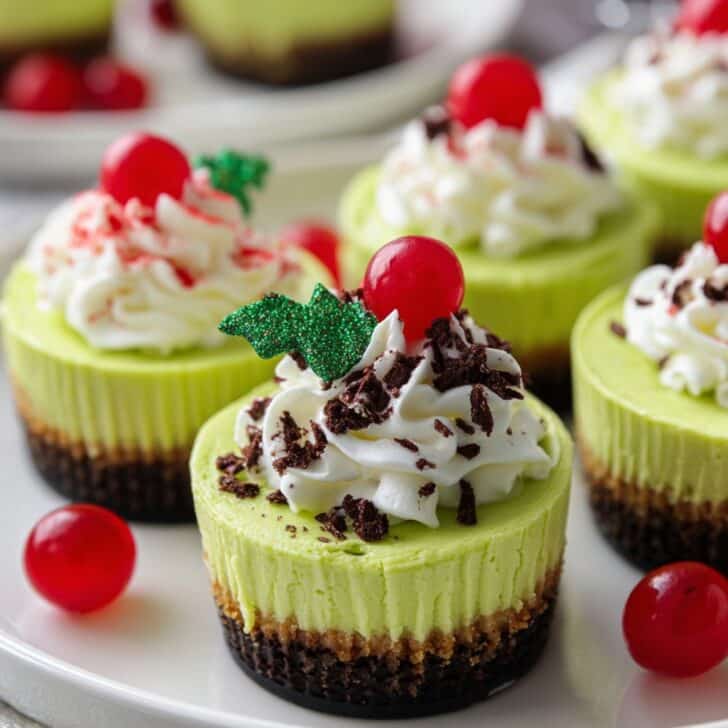
Alright, let’s get one thing straight—these Grinch Mini Cheesecakes were born in the chaos of a last-minute holiday potluck with my cousin Shelby. She insisted that we make something “cute and green,” but neither of us wanted to deal with a cake’s drama. In the end, we made these mini cheesecakes, and I’ve gotta say, even our grumpy Uncle Frank cracked a smile. And that’s saying something. If you detest standing over a stove for hours or just need a show-stopper that looks like you fussed (when you didn’t), these are for you.
Why I Keep Coming Back to This Recipe
I make this when I want to trick my nieces into thinking I’m way cooler (and when I’m craving cheesecake bites—let’s be honest). My family goes bananas for them because they’re bite-sized, bright as a traffic light, and, well, who can resist the tiny little hearts on top? Do yourself a favor and use proper cupcake liners; I tried with generic waxed ones last Christmas, and let’s just say we ate the first batch with spoons.
Grab These Ingredients (Swaps Totally Welcome!)
- 12 vanilla wafer cookies (I’ve used mini graham crackers in a pinch, and nobody noticed)
- 2 (8-ounce) packages of cream cheese, softened (sometimes I do one block of full-fat, one of light—makes me feel slightly less guilty)
- ½ cup granulated sugar (brown sugar adds a nice twist—just a hint, not too much)
- 2 large eggs (room temp is best, but honestly, I rarely remember in advance)
- 1 teaspoon vanilla extract (my granny swore by Nielsen-Massey, but store-brand is fine too)
- Green gel food coloring (I’ve used liquid, but it’s never quite as vivid—still, it’ll do in a bind)
- Mini cupcake liners
- Tiny red heart sprinkles (or, slice up red gumdrops if you’re in a jam—I did it once and it worked out fine)
Here’s How I Usually Do It
- Get your oven to 325 F (160 C). Line up about 24 mini muffin cups with liners. No need to spray them. Honestly, don’t skip the liner or you’ll be wrestling cheesecake out of metal, and trust me, it ends in tragedy.
- Stick a vanilla wafer in each cup. If it doesn’t fit, just snap them—no biggie. Sometimes I nibble the leftovers.
- Beat the cream cheese with the sugar until it’s smooth and fluffy. Use a mixer if you’ve got one, but I’ve done it with a sturdy spoon and a bit of elbow grease. (This is usually where I sneak a little taste. Quality control, right?)
- Add the eggs one at a time, blending slowly. If this gets a tad lumpy, don’t stress—it smooths out with a bit of mixing, but don’t over-beat. Been there, caused the cracks.
- Pour in the vanilla, then squeeze in the green gel food coloring until it reaches your preferred Grinchy hue. Some years, it’s a vibrant grass green. Other times, it’s more Kermit. Both work.
- Spoon the cheesecake batter over the cookies. I aim for about ¾ full, but I always end up with a little extra. You can make a ‘bonus’ cheesecake in a ramekin (baker’s treat, right?).
- Bake 15-18 minutes or until just set. Don’t panic if they puff. They’ll settle down as they cool and, yes, might look a bit strange right out of the oven. It’s normal!
- Let them cool in the tin. I actually pop mine in the fridge for at least two hours (sometimes overnight if I remember and don’t eat them all first).
- Top each with a red heart (and maybe a sprinkle of crushed candy cane if you’re feeling wild).
Hey, Here Are Some Real-World Notes
- If you overfill the liners, the cheesecakes sometimes get that little muffin top effect. It’s fine, but don’t expect photo-perfection unless you’re really careful.
- I once used regular food dye and ended up with a sad pastel—not exactly Grinch vibes. Gel is your mate here.
- Letting the cheesecakes chill for a while makes them easier to peel from the liner—otherwise, they stick a tad. Learned that one the hard way.
Variations I’ve Tried (For Better or Worse)
- Add a teaspoon of peppermint extract for a festive twist. My nephew says it “tastes like Christmas.”
- You can swap the vanilla wafer for chocolate cookies. Actually, I find that it’s a bit too rich for my taste, but folks seem to love it.
- Tried stuffing a little raspberry in the middle once. It leaked everywhere. Maybe skip that one…
- If you want a gluten-free version, Schär vanilla cookies are fine (though a bit crumbly, but worth it if you need it).
You (Don’t) Need All This Equipment
- Mini muffin tin – but if you only have standard muffin tins, just bake a bit longer (maybe 20 min?) and double up the liners
- Hand or stand mixer (or, lots of patience with a spoon… it’s doable, if not exactly swift)
- A basic mixing bowl – doesn’t need to be fancy; I’ve used a cereal bowl in a pinch, just watch the splatter
- Measuring cups, or just eyeball a “handful” if you’re feeling lucky… Actually, maybe not for the sugar

Storing and Keeping These Around (Ha!)
Pop them in a sealed container in the fridge—they’ll hold for 3-4 days. But, honestly, in my house? They disappear before sunset. If you ever have leftovers (rare occasion), I think they taste better the next day, colder and a bit firmer.
How We Serve ‘Em
I love to set these out with a big mug of hot chocolate—extra marshmallows please. Sometimes we make a tiny “Grinch dessert bar” at home, with these cheesecakes, green punch (this one from AllRecipes) and some sugar cookies. It’s become a goofy little family tradition. My nephew insists on eating his while watching the classic animated movie (the old one, not the Jim Carrey version—team OG Grinch!).
The Things I’ve Learned the Hard Way (So You Don’t Have To)
- Don’t rush the cooling; I once tried peeling them warm and the whole thing turned into a green glob. Tasty, but not pretty.
- Cracked cheesecakes usually mean over-mixed or over-baked. It’s never ruined, though—I just pipe whipped cream on top. No one’s the wiser.
- Actually, letting kids help with the food coloring is fun—but maybe set some ground rules unless you want radioactive green fingers everywhere.
FAQ: Things Friends Really Ask Me
- Can I freeze these? Yep, just flash freeze first on a tray, then bag ‘em; they thaw best in the fridge. But the texture’s a bit softer after thawing.
- Why are mine sticky? Probably not chilled long enough. Or, sometimes it’s humid—happens to everyone, honestly.
- What if I don’t have mini cupcake liners? I’d cut strips of parchment and make a “sling” in each hole—doesn’t look as cute but gets the job done.
- Can I double this for a crowd? For sure! I recently did for my bowling club’s party (that’s another story, I’ll spare you). Only thing: space them out on the tray so the air circulates.
- Where do you get those red heart sprinkles? Mostly Amazon or my local baking shop, but you can totally order them from Wilton (if you plan ahead unlike me!).
By the way—if you want more quirky green holiday ideas, Sally’s Grinch cookies are a hoot too. Actually, maybe next year I’ll just make both and call it a theme. If you do something wild or have a tip I missed, drop a line—I’m always up for kitchen gossip (or, you know, cheesecake ideas).

Ingredients
- 1 cup graham cracker crumbs
- 3 tablespoons unsalted butter, melted
- 2 (8 oz) packages cream cheese, softened
- 1/2 cup granulated sugar
- 2 large eggs
- 1/2 teaspoon vanilla extract
- 1/4 cup sour cream
- Green gel food coloring
- Red heart-shaped sprinkles
Instructions
-
1Preheat the oven to 325°F (163°C). Line a 12-count muffin tin with paper liners.
-
2In a small bowl, mix graham cracker crumbs and melted butter until well combined. Divide mixture evenly among muffin cups and press firmly into the bottom.
-
3In a large bowl, beat cream cheese and sugar together until smooth. Add eggs one at a time, mixing after each addition. Stir in vanilla extract and sour cream until well blended.
-
4Add green gel food coloring and mix until a vibrant green shade is reached.
-
5Spoon the cheesecake mixture evenly onto the crusts in each muffin cup.
-
6Bake for 16-18 minutes, or until the centers are set. Cool completely, then top each with a red heart-shaped sprinkle before serving.
Approximate Information for One Serving
Nutrition Disclaimers
Number of total servings shown is approximate. Actual number of servings will depend on your preferred portion sizes.
Nutritional values shown are general guidelines and reflect information for 1 serving using the ingredients listed, not including any optional ingredients. Actual macros may vary slightly depending on specific brands and types of ingredients used.
To determine the weight of one serving, prepare the recipe as instructed. Weigh the finished recipe, then divide the weight of the finished recipe (not including the weight of the container the food is in) by the desired number of servings. Result will be the weight of one serving.
Did you make this recipe?
Please consider Pinning it!!