
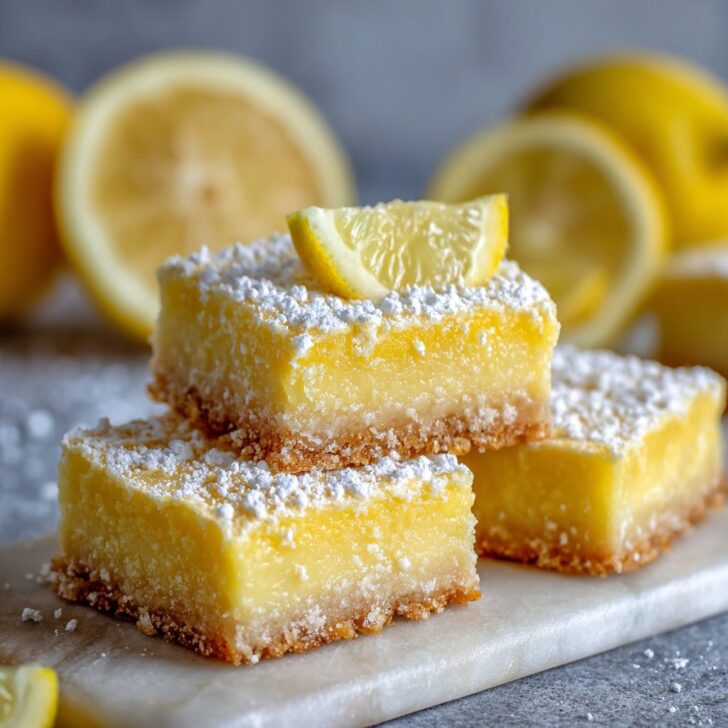

Hey y'all! If you're searching for a refreshing, creamy treat that’s bursting with citrus flavor, these Frozen Lemon Bars are calling your name. With a buttery crust and a velvety, tart lemon filling, this chill dessert is the ultimate summertime crowd-pleaser—perfect for BBQs, potlucks, or just a sweet afternoon pick-me-up. Plus, no oven required! Let’s get cooking!
Why You'll Love This Frozen Lemon Bars Recipe
- No-bake ease: Skip the oven and whip up this simple dessert with minimal fuss.
- Creamy & zesty flavor: The perfect balance of tangy lemon and sweet, velvety filling.
- Make-ahead friendly: Prepare in advance and freeze for up to a month.
- Super refreshing: Ideal for hot days when you need a cool treat.
- Customizable: Adapt with your favorite citrus or gluten-free crust options!
Ingredients for Frozen Lemon Bars
- 1 ½ cups graham cracker crumbs
- ¼ cup granulated sugar
- ½ cup unsalted butter, melted
- 1 can (14 oz) sweetened condensed milk
- ½ cup fresh lemon juice (about 3-4 lemons)
- 2 teaspoons lemon zest
- 1 package (8 oz) cream cheese, softened
- 1 teaspoon pure vanilla extract
- ¼ teaspoon salt
- Optional: Powdered sugar and extra lemon zest for garnish
How to Make Frozen Lemon Bars
Step 1: Prepare the Crust
- Line an 8x8-inch baking pan with parchment paper, leaving a 2-inch overhang for easy removal.
- In a medium bowl, mix graham cracker crumbs, granulated sugar, and melted butter until fully combined and the texture resembles wet sand.
- Press the mixture firmly into the bottom of the prepared pan to form an even layer. Freeze for 15 minutes while you make the filling.
Step 2: Make the Creamy Lemon Filling
- In a large mixing bowl, beat softened cream cheese until smooth and fluffy.
- Add sweetened condensed milk, lemon juice, lemon zest, vanilla extract, and salt. Beat until completely smooth and well-blended.
Step 3: Assemble and Freeze
- Pour the lemon mixture over the chilled crust. Smooth the top with a spatula.
- Freeze uncovered for at least 5 hours, or until fully set. For best texture, freeze overnight.
Step 4: Slice and Serve
- Remove the pan from the freezer and let sit at room temperature for 10 minutes. Lift bars out using the parchment overhang.
- Cut into squares with a sharp knife, wiping blade between cuts for clean edges. Dust with powdered sugar and more lemon zest, if desired.
Notes for Perfect Frozen Lemon Bars
- For an extra firm crust, bake it at 350°F (175°C) for 8 minutes, then cool completely before adding the filling (totally optional!).
- Use freshly squeezed lemon juice for the brightest, freshest flavor. Check out these tips for juicing lemons.
- Soften cream cheese to room temperature for a smooth, lump-free filling.


Frozen Lemon Bars Variations
- Berry Swirl: Drop spoonfuls of raspberry or blueberry puree over the filling before freezing, then swirl for a fruity twist.
- Gluten-Free: Substitute gluten-free graham crackers for a celiac-friendly dessert.
- Lime or Orange Bars: Swap lemon juice/zest for lime or orange for a different citrus profile.
Required Equipment for Frozen Lemon Bars
- 8x8-inch baking pan
- Parchment paper
- Mixing bowls
- Electric mixer or hand whisk
- Measuring cups and spoons
- Rubber spatula
- Sharp knife
Frozen Lemon Bars Storage Instructions
Store Frozen Lemon Bars in an airtight container in the freezer for up to 1 month. For best taste and texture, enjoy within 2 weeks. Let bars sit at room temperature for 10–15 minutes before serving for a creamy bite.
Serving and Pairing Suggestions
- Top with whipped cream and fresh berries for a fancy finish.
- Pair with iced tea, lemonade, or a crisp white wine for a perfect summer treat.
- Serve alongside a light picnic salad for a refreshing meal.
Pro Tips for the Best Frozen Lemon Bars
- For extra clean slices, dip your knife in hot water and wipe dry before cutting each bar.
- Don’t over-mix the filling—blend just until smooth to avoid incorporating excess air.
- Experiment with Meyer lemons for a sweeter, less tart flavor. Check out more Meyer lemon tips.
Frozen Lemon Bars FAQ
Can I make Frozen Lemon Bars ahead of time?
Absolutely! These bars are designed for freezing, so make them up to a month in advance and store them in an airtight container.
Can I use bottled lemon juice instead of fresh?
Fresh lemon juice delivers the best taste, but bottled juice works in a pinch if necessary.
How do I prevent the crust from crumbling?
Ensure you use enough melted butter and press the crust firmly into the pan. A quick bake will also help set it if preferred.
Prep time: 20 minutes
Freeze time: 5 hours
Total time: 5 hours 20 minutes
Yield: 16 bars


Ingredients
- 1 ½ cups graham cracker crumbs
- ⅓ cup unsalted butter, melted
- ¼ cup granulated sugar
- 1 can (14 oz) sweetened condensed milk
- ½ cup fresh lemon juice
- 1 tablespoon lemon zest
- 1 cup heavy whipping cream
- ¼ teaspoon salt
Instructions
-
1Line an 8x8-inch baking pan with parchment paper, leaving an overhang for easy removal.
-
2In a medium bowl, combine graham cracker crumbs, melted butter, and granulated sugar. Press the mixture firmly into the bottom of the prepared pan to form an even crust.
-
3Bake the crust at 350°F (175°C) for 12-15 minutes until lightly golden. Let cool completely.
-
4In a large bowl, whisk together sweetened condensed milk, fresh lemon juice, lemon zest, and salt until smooth.
-
5In a separate bowl, whip the heavy cream until stiff peaks form. Gently fold the whipped cream into the lemon mixture until fully combined.
-
6Spread the lemon filling evenly over the cooled crust. Freeze for at least 3 hours or until firm. Slice into bars and serve chilled.
Approximate Information for One Serving
Nutrition Disclaimers
Number of total servings shown is approximate. Actual number of servings will depend on your preferred portion sizes.
Nutritional values shown are general guidelines and reflect information for 1 serving using the ingredients listed, not including any optional ingredients. Actual macros may vary slightly depending on specific brands and types of ingredients used.
To determine the weight of one serving, prepare the recipe as instructed. Weigh the finished recipe, then divide the weight of the finished recipe (not including the weight of the container the food is in) by the desired number of servings. Result will be the weight of one serving.
Did you make this recipe?
Please consider Pinning it!!