

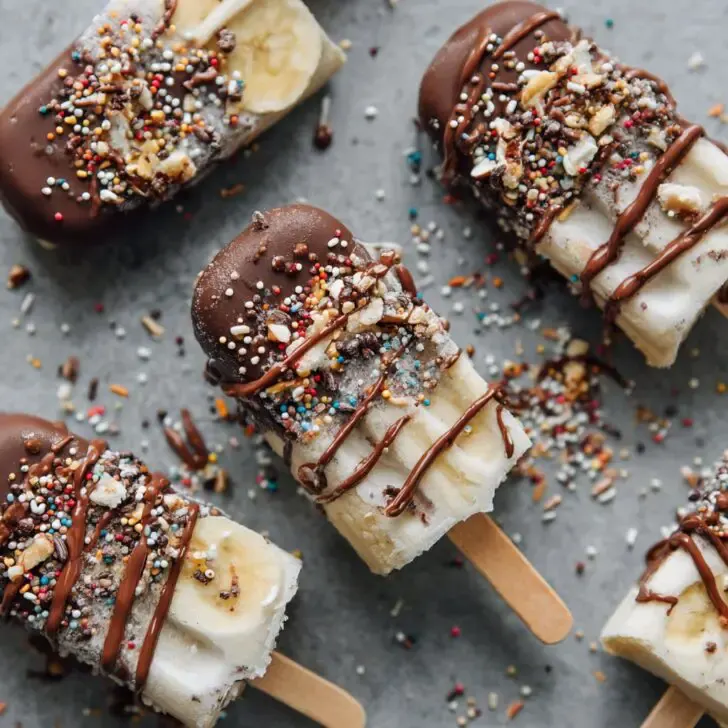
Hey y'all! If you're looking for a crowd-pleasing dessert that's equal parts fun, healthy, and downright delicious, these Frozen Chocolate Banana Pops are just the ticket. They're creamy, chocolatey, and delightfully easy to customize—perfect for hot summer days, after-school snacks, or even festive parties. Ready to whip up a batch of these irresistible treats? Let's get cooking!
Why You'll Love This Frozen Chocolate Banana Pops Recipe
- Super easy to make in under 20 minutes of prep—no baking required!
- Healthy and naturally sweet, thanks to ripe bananas and dark chocolate.
- Great for kids and adults, with endless options for toppings and flavors.
- Perfect for cooling off on a hot day or serving at parties.
- Gluten-free, dairy-free (with vegan chocolate), and allergy-friendly options.
Ingredients for Frozen Chocolate Banana Pops
- 4 large ripe bananas
- 1 ½ cups semi-sweet or dark chocolate chips (about 9 oz)
- 2 tablespoon coconut oil
- ½ cup chopped nuts (e.g., peanuts, almonds, walnuts) – optional
- ¼ cup rainbow sprinkles or mini chocolate chips – optional
- 8 popsicle sticks or wooden skewers
How to Make Frozen Chocolate Banana Pops
Step 1: Prep the Bananas
- Peel the bananas and slice each in half crosswise, for a total of 8 pieces.
- Insert a popsicle stick or skewer into the cut end of each banana half.
- Place the bananas on a parchment-lined baking sheet and freeze for 1 hour, until firm.
Step 2: Melt the Chocolate
- In a microwave-safe bowl, combine chocolate chips and coconut oil.
- Microwave in 30-second increments, stirring between each, until smooth and fully melted (about 1-2 minutes total).
- Alternatively, melt the chocolate and coconut oil in a heatproof bowl over a pot of simmering water, stirring until smooth (learn how to melt chocolate here).
Step 3: Dip and Decorate the Banana Pops
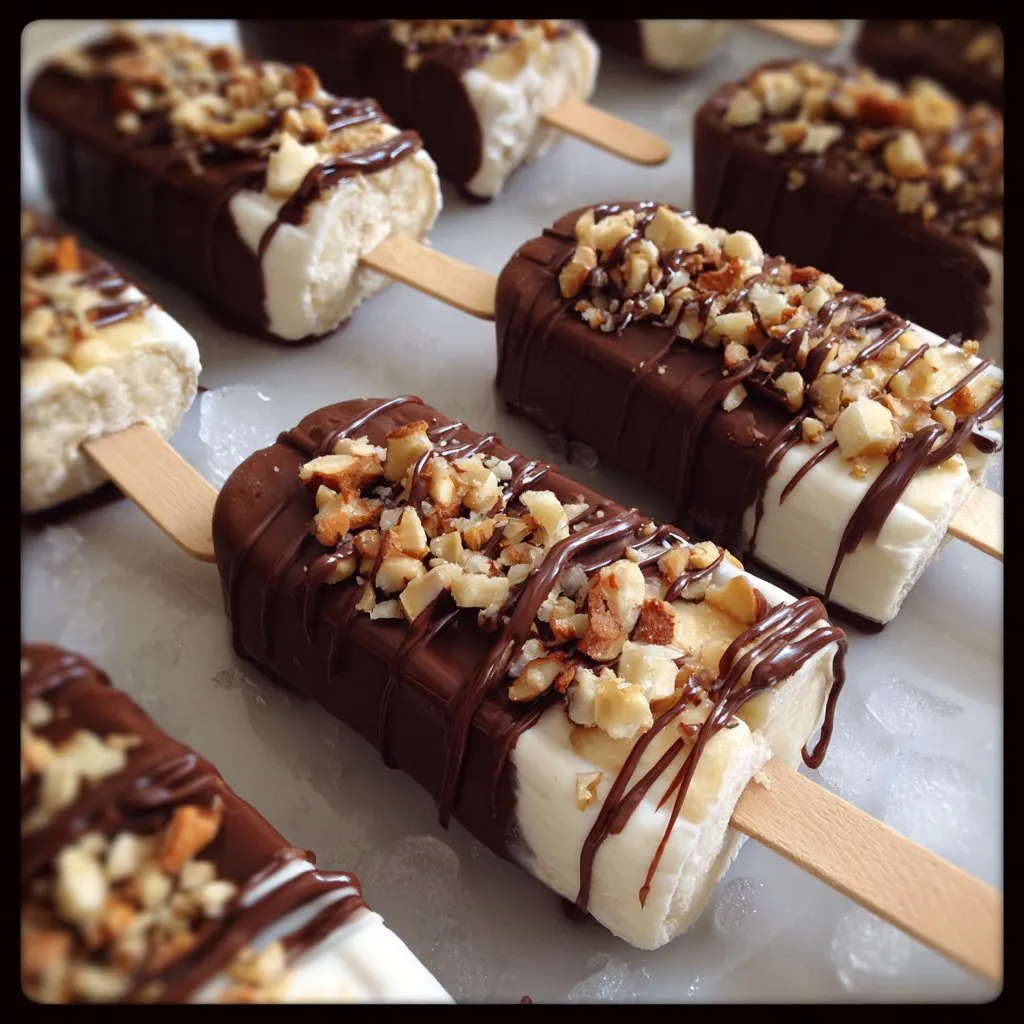
- Dip each frozen banana into the melted chocolate, using a spoon to help coat evenly.
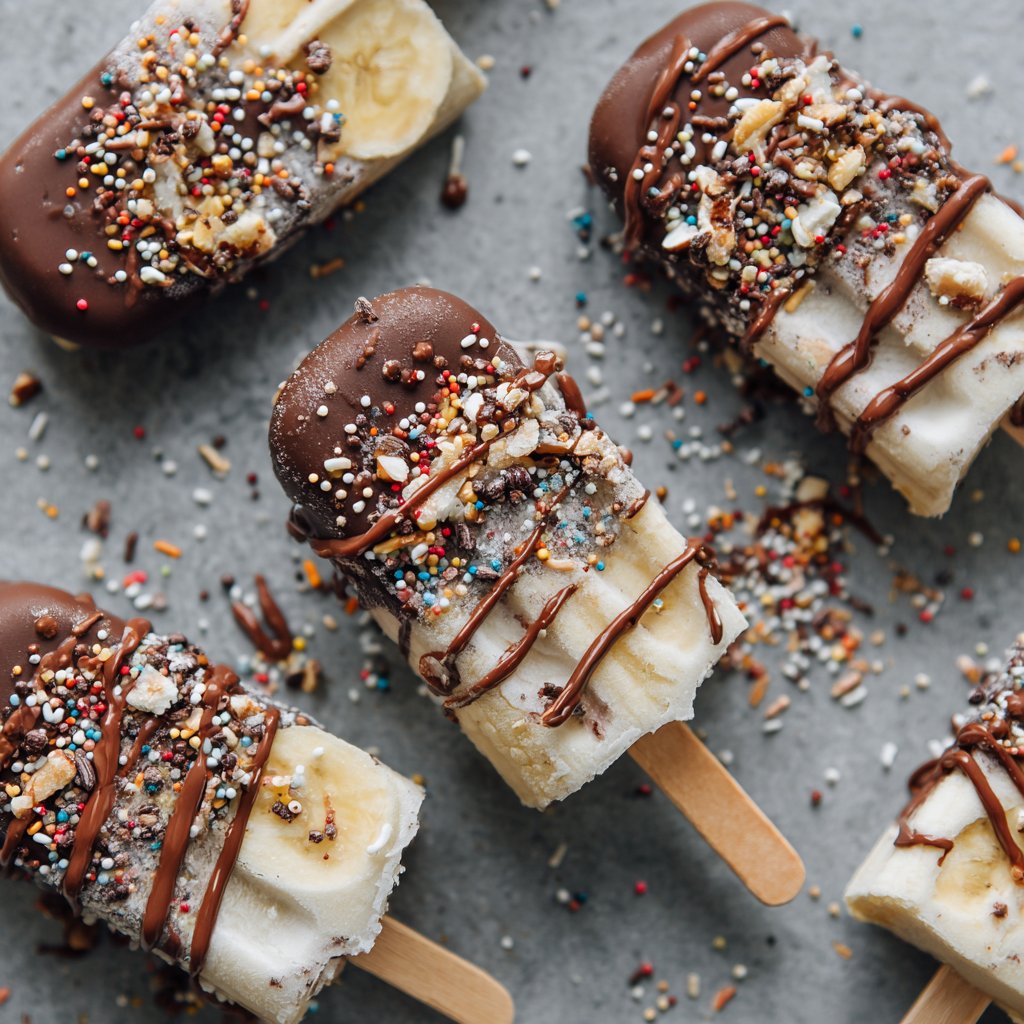
- Quickly sprinkle with your favorite toppings, such as chopped nuts or sprinkles, before the chocolate sets.
- Return the dipped bananas to the parchment-lined tray.
Step 4: Freeze Until Set
- Freeze the chocolate-dipped banana pops for at least 1 hour, or until the chocolate is firm.
Notes & Helpful Tips for Frozen Chocolate Banana Pops
- Use ripe but firm bananas for the best texture and sweetness.
- If you don't have coconut oil, you can use vegetable oil or skip it, but coconut oil ensures a glossy, snappy chocolate coating.
- For more on the health benefits of bananas, check out this banana nutrition guide.

Frozen Chocolate Banana Pops Variations
- Peanut Butter Drizzle: Drizzle melted peanut butter over the chocolate for a classic combo.
- White Chocolate: Swap the dark chocolate for white chocolate and top with freeze-dried berries.
- Trail Mix Crunch: Roll dipped pops in a mixture of granola, seeds, and dried fruit for extra crunch.
Required Equipment for Frozen Chocolate Banana Pops
- Parchment paper-lined baking sheet
- Microwave-safe or heatproof bowl
- Popsicle sticks or wooden skewers
- Sharp knife and cutting board
How to Store Frozen Chocolate Banana Pops
Once completely frozen, transfer the pops to an airtight container or freezer bag. They’ll stay fresh and delicious for up to 2 weeks. For best texture, enjoy them straight from the freezer—no thawing needed!
Serving & Pairing Suggestions for Frozen Chocolate Banana Pops
- Serve as a cool snack on a sunny afternoon or as a fun dessert at summer parties.
- Pair with iced coffee, lemonade, or a fruit smoothie for a refreshing treat.
- Set up a DIY banana pop bar and let guests pick their favorite toppings!
Pro Tips for the Best Frozen Chocolate Banana Pops
- Use a tall glass for dipping bananas to get a smooth, even chocolate coating (see detailed technique here).
- Work quickly when dipping and decorating to prevent the chocolate from hardening before adding toppings.
- Don’t skip the freezing step before dipping—cold bananas help the chocolate set instantly for a crisp shell.
FAQ: Frozen Chocolate Banana Pops
- Can I use milk chocolate instead of dark or semi-sweet?
- Absolutely! Any type of chocolate works—just pick your favorite flavor.
- How do I keep the bananas from turning brown?
- Freezing them right away after peeling and using a chocolate coating helps prevent browning.
- Can I make these ahead of time for a party?
- Yes! Make them up to 2 weeks in advance and store in an airtight container in the freezer.
Prep Time: 15 minutes
Total Time: 2 hours (includes freezing time)

Ingredients
- 3 large ripe bananas
- 1 ½ cups semisweet chocolate chips
- 2 tablespoons coconut oil
- ¼ cup chopped peanuts
- ¼ cup rainbow sprinkles
- ¼ cup shredded coconut
- 6 wooden popsicle sticks
- Parchment paper
Instructions
-
1Peel the bananas and cut each in half crosswise. Insert a wooden popsicle stick into the cut end of each banana half.
-
2Place the banana pops on a parchment-lined baking sheet and freeze for at least 1 hour, or until firm.
-
3In a microwave-safe bowl, combine the chocolate chips and coconut oil. Microwave in 30-second intervals, stirring between each, until the chocolate is melted and smooth.
-
4Dip each frozen banana pop into the melted chocolate, using a spoon to help coat evenly. Immediately sprinkle with chopped peanuts, shredded coconut, or rainbow sprinkles as desired.
-
5Return the coated banana pops to the parchment-lined baking sheet and freeze for another 30-45 minutes, or until the chocolate is set.
-
6Serve frozen and enjoy!
Approximate Information for One Serving
Nutrition Disclaimers
Number of total servings shown is approximate. Actual number of servings will depend on your preferred portion sizes.
Nutritional values shown are general guidelines and reflect information for 1 serving using the ingredients listed, not including any optional ingredients. Actual macros may vary slightly depending on specific brands and types of ingredients used.
To determine the weight of one serving, prepare the recipe as instructed. Weigh the finished recipe, then divide the weight of the finished recipe (not including the weight of the container the food is in) by the desired number of servings. Result will be the weight of one serving.
Did you make this recipe?
Please consider Pinning it!!