

Hey y'all! If you're craving a dessert that's bursting with cozy fall flavor and creamy sweetness, this Easy Ninja Creami Ice Cream with Apple Cider Syrup is about to become your new obsession. It's the perfect treat for holiday gatherings, after-dinner indulgences, or simply celebrating a crisp autumn day. With the Ninja Creami, making homemade ice cream is effortless and fun—especially paired with a luscious apple cider syrup drizzle. Let's get cooking!
Why You'll Love This Easy Ninja Creami Ice Cream with Apple Cider Syrup
- Ultra Creamy: The Ninja Creami delivers a rich, velvety texture every time.
- Seasonal Bliss: Apple cider syrup adds a tangy-sweet burst of fall flavor.
- Customizable: Easily swap mix-ins or syrups for endless creativity.
- Effortless Prep: Quick, simple steps that anyone can follow—no churning or eggs required!
- Perfect for Entertaining: Impress guests with a unique, homemade frozen dessert.
Ingredients for Easy Ninja Creami Ice Cream with Apple Cider Syrup
- 1 ½ cups whole milk (cold)
- 1 cup heavy cream
- ⅓ cup granulated sugar
- 1 teaspoon pure vanilla extract
- Pinch of salt
- For the Apple Cider Syrup:
- 1 cup apple cider
- 2 tablespoon brown sugar
- ½ teaspoon ground cinnamon
- ⅛ teaspoon ground nutmeg
- 1 teaspoon lemon juice
Directions: Easy Ninja Creami Ice Cream with Apple Cider Syrup
Step 1: Prepare the Ice Cream Base
- In a medium bowl, whisk together whole milk, heavy cream, granulated sugar, vanilla extract, and pinch of salt until the sugar is dissolved.
- Pour the mixture into a Ninja Creami pint container and secure the lid.
- Place the container in the freezer for at least 24 hours, making sure it sits level and undisturbed.
Step 2: Make the Apple Cider Syrup
- In a small saucepan, combine apple cider, brown sugar, cinnamon, and nutmeg over medium-high heat.
- Bring to a gentle boil, then reduce to a simmer. Stir occasionally and cook for 15-18 minutes, or until the liquid is reduced by half and thickened to a syrupy consistency.
- Remove from heat, stir in lemon juice, and let cool completely.
Step 3: Spin and Serve
- After 24 hours, remove the ice cream base from the freezer.
- Place the container in your Ninja Creami and process using the "Ice Cream" function (approx. 2-3 minutes).
- If the texture is too firm, add 1-2 tablespoons of milk and use the "Re-spin" function until creamy.
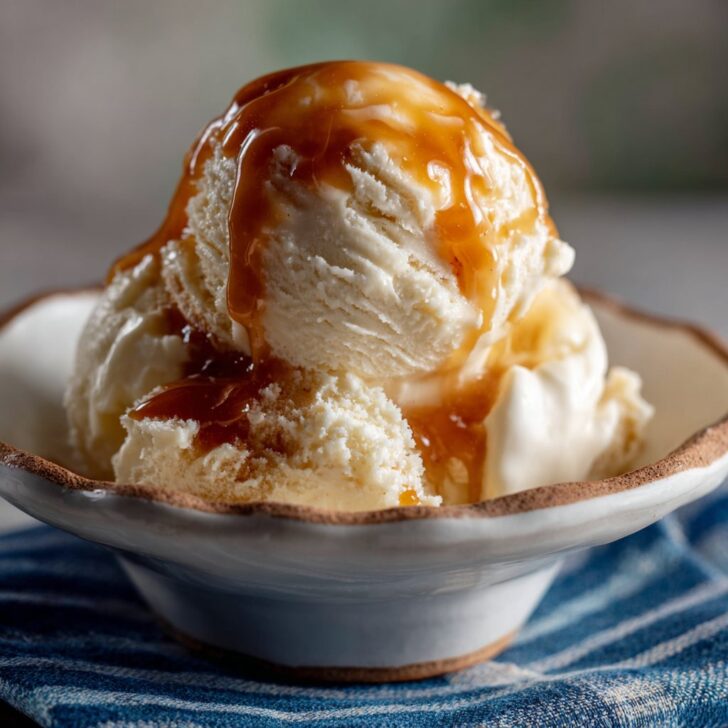
- Scoop into bowls and drizzle generously with cooled apple cider syrup.


Notes for Perfect Easy Ninja Creami Ice Cream with Apple Cider Syrup
- For an extra smooth texture, make sure your base is fully dissolved and strain if needed. Learn more about ice cream textures from Serious Eats.
- Cool the apple cider syrup completely before drizzling over the ice cream for the best presentation.
- You can adjust the spice level in the syrup according to your taste preferences.
Easy Ninja Creami Ice Cream with Apple Cider Syrup: Variations
- Caramel Apple Creami: Add 2 tablespoon caramel sauce to the base for extra decadence.
- Dairy-Free Version: Substitute coconut milk and coconut cream for a plant-based treat.
- Crunchy Topping: Fold in ½ cup chopped toasted pecans or granola right after spinning.
Required Equipment for Easy Ninja Creami Ice Cream with Apple Cider Syrup
- Ninja Creami Ice Cream Maker
- Pint containers (Ninja Creami compatible)
- Medium mixing bowl
- Whisk
- Small saucepan
- Measuring cups and spoons
Storage Instructions for Easy Ninja Creami Ice Cream with Apple Cider Syrup
- Store leftover ice cream in the Ninja Creami pint container, tightly sealed, in the freezer for up to 2 weeks.
- Apple cider syrup can be refrigerated in an airtight container for up to 10 days.
Serving Recommendations for Easy Ninja Creami Ice Cream with Apple Cider Syrup
- Top with extra cinnamon, candied nuts, or a dollop of whipped cream.
- Serve alongside warm apple pie or spiced cookies for a festive dessert.
- Pair with hot apple cider for the ultimate fall treat. For spiced beverage inspiration, check out this Food Network Spiced Cider Guide.
Pro Tips for the Best Easy Ninja Creami Ice Cream with Apple Cider Syrup
- Freeze the base for a full 24 hours, as under-freezing leads to icy, less creamy results.
- Always let syrup cool to room temperature before drizzling to prevent melting your ice cream.
- For nutritional info on dairy and apple cider, visit Healthline's Apple Cider Benefits.
Easy Ninja Creami Ice Cream with Apple Cider Syrup: FAQ
- Can I make this ice cream without a Ninja Creami?
- While the Ninja Creami provides the easiest texture, you can freeze the base in a loaf pan and stir every 30 minutes until creamy, though results may vary.
- Is there a way to make the ice cream base ahead of time?
- Yes! Prepare the base up to 48 hours ahead, store in the fridge, and freeze when ready.
- Can I use store-bought apple cider syrup?
- Absolutely—just make sure it’s thick and flavorful for the best results!
Prep Time: 10 minutes
Cook Time: 20 minutes
Freeze Time: 24 hours
Total Time: 24 hours 30 minutes


Ingredients
- 1 ½ cups whole milk
- 1 cup heavy cream
- ½ cup granulated sugar
- 1 teaspoon vanilla extract
- ¼ teaspoon ground cinnamon
- 1 cup apple cider
- 2 tablespoons brown sugar
- 1 tablespoon unsalted butter
- Pinch of salt
Instructions
-
1In a mixing bowl, whisk together whole milk, heavy cream, granulated sugar, vanilla extract, and ground cinnamon until the sugar is dissolved.
-
2Pour the ice cream base into the Ninja Creami pint container, seal, and freeze for at least 8 hours or overnight.
-
3To make the apple cider syrup, combine apple cider, brown sugar, unsalted butter, and a pinch of salt in a small saucepan. Bring to a boil, then simmer for 15-20 minutes until reduced by half and syrupy. Let cool completely.
-
4Once the ice cream base is fully frozen, process it in the Ninja Creami according to the manufacturer's instructions until smooth and creamy.
-
5Spoon the apple cider syrup over the churned ice cream and gently swirl it in. Serve immediately or refreeze for a firmer texture.
Approximate Information for One Serving
Nutrition Disclaimers
Number of total servings shown is approximate. Actual number of servings will depend on your preferred portion sizes.
Nutritional values shown are general guidelines and reflect information for 1 serving using the ingredients listed, not including any optional ingredients. Actual macros may vary slightly depending on specific brands and types of ingredients used.
To determine the weight of one serving, prepare the recipe as instructed. Weigh the finished recipe, then divide the weight of the finished recipe (not including the weight of the container the food is in) by the desired number of servings. Result will be the weight of one serving.
Did you make this recipe?
Please consider Pinning it!!