
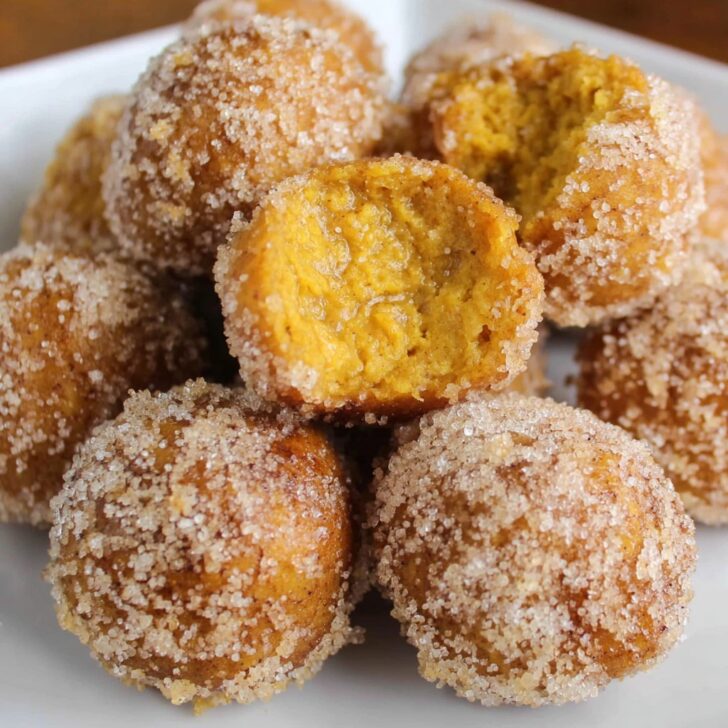
Hey y’all! If you’re craving a sweet fall treat that’s quick, fluffy, and absolutely bursting with warm pumpkin spice, these Easy Bisquick Pumpkin Donut Holes are about to become your new go-to. They pair the simple magic of Bisquick with cozy pumpkin puree and a cinnamon-sugar finish, making them perfect for breakfast, brunch, or festive gatherings. Trust me—nobody can eat just one! Ready for a fast, crowd-pleasing recipe that tastes bakery-fresh? Let’s get cooking!
Why You’ll Love This Easy Bisquick Pumpkin Donut Holes Recipe
- Quick & Simple: Minimal prep and no yeast—ready in under 30 minutes!
- Perfectly Spiced: Warm, aromatic spices and real pumpkin make them wonderfully flavorful.
- Super Fluffy Texture: Bisquick keeps these donut holes soft and airy.
- Fun to Make: Great for baking with kids and ideal for autumn parties or quick snacks.
- Versatile: Easy to customize and delicious any time of day.
Easy Bisquick Pumpkin Donut Holes Ingredients
- 2 cups Bisquick baking mix
- ½ cup canned pumpkin puree (not pumpkin pie mix)
- ¼ cup granulated sugar
- ¼ cup milk
- 1 egg
- 1 teaspoon ground cinnamon
- ¼ teaspoon ground nutmeg
- ⅛ teaspoon ground cloves
- 1 teaspoon vanilla extract
- Vegetable oil, for frying
- For Cinnamon Sugar Coating:
- ½ cup granulated sugar
- 1 teaspoon ground cinnamon
How To Make Easy Bisquick Pumpkin Donut Holes
Step 1: Mix the Batter
In a large bowl, whisk together the pumpkin puree, egg, milk, sugar, and vanilla extract until smooth. Add the Bisquick, cinnamon, nutmeg, and cloves. Mix until just combined—the batter should be thick and slightly sticky.
Step 2: Shape the Donut Holes
Using a tablespoon or small cookie scoop, drop rounded balls of dough onto a parchment-lined tray. You should get around 20-24 donut holes, depending on size.
Step 3: Fry the Donut Holes
Heat 2 inches of vegetable oil in a heavy-bottomed pot or Dutch oven to 350°F (175°C). Fry the donut holes in batches for 2-3 minutes per side, or until golden brown and cooked through. Use a slotted spoon to remove them and drain on a paper towel-lined plate.
Step 4: Coat with Cinnamon Sugar
While the donut holes are still warm, roll them in the cinnamon-sugar mixture until fully coated. Serve immediately for best results!
Notes for Easy Bisquick Pumpkin Donut Holes
- Ensure the oil temperature stays at 350°F by checking with a thermometer (see frying tips here).
- Don’t overmix the batter—this keeps your donut holes soft and fluffy.
- Use 100% pure pumpkin puree, not pumpkin pie filling (more about pumpkin puree).

Variations: Easy Bisquick Pumpkin Donut Holes Twists
- Baked Version: Bake at 375°F for 10-12 minutes in a mini muffin pan, then coat in cinnamon sugar.
- Cream Cheese Filled: Inject donut holes with sweetened cream cheese after frying for a luscious surprise.
- Maple Glaze: Skip the cinnamon sugar and dip warm donut holes in homemade maple glaze for extra autumn flavor.
Required Equipment for Making Easy Bisquick Pumpkin Donut Holes
- Large mixing bowl
- Whisk
- Cookie scoop or tablespoon
- Heavy-bottomed pot or Dutch oven
- Kitchen thermometer
- Slotted spoon
- Paper towels
Easy Bisquick Pumpkin Donut Holes Storage Instructions
Store leftover donut holes in an airtight container at room temperature for up to 2 days. For longer storage, keep in the fridge for up to 4 days (briefly warm before serving). These donut holes are at their best on day one!
Serving Suggestions and Pairings for Easy Bisquick Pumpkin Donut Holes
- Pair with a pumpkin spice latte or hot apple cider for the ultimate fall breakfast.
- Serve as a sweet brunch centerpiece, with whipped cream or caramel sauce on the side.
- Enjoy at dessert time with vanilla ice cream!
Pro Tips for Perfect Easy Bisquick Pumpkin Donut Holes
- Maintain a consistent oil temperature for even browning (deep frying tips).
- Work in small batches to prevent crowding and soggy donut holes.
- Roll in cinnamon sugar while warm so the coating sticks perfectly.
FAQ: Easy Bisquick Pumpkin Donut Holes
- Can I bake these donut holes instead of frying?
- Absolutely! Scoop into a mini muffin pan and bake at 375°F for 10-12 minutes, then coat in cinnamon sugar.
- Can I use homemade baking mix instead of Bisquick?
- Yes! Just make sure your mix contains flour, baking powder, salt, and fat (like shortening or butter).
- Do I have to refrigerate leftovers?
- Room temperature for 2 days is fine, but refrigerate if storing longer for freshness. Reheat for best flavor!
Enjoy making and sharing these Easy Bisquick Pumpkin Donut Holes—your taste buds (and guests!) will thank you.

Ingredients
- 2 cups Bisquick baking mix
- 1/2 cup canned pumpkin puree
- 1/4 cup granulated sugar
- 1/2 cup milk
- 1 large egg
- 1 teaspoon pumpkin pie spice
- 1/2 teaspoon ground cinnamon
- Vegetable oil, for frying
- 1/4 cup melted butter (for coating)
- 1/2 cup cinnamon sugar (for rolling)
Instructions
-
1In a large bowl, whisk together the Bisquick baking mix, granulated sugar, pumpkin pie spice, and ground cinnamon.
-
2In a separate bowl, whisk the canned pumpkin puree, milk, and egg until well combined.
-
3Pour the wet ingredients into the dry ingredients and mix until just combined, forming a thick batter.
-
4Heat about 2 inches of vegetable oil in a deep pot to 350°F (175°C). Drop rounded tablespoons of batter into the hot oil, cooking in batches.
-
5Fry the donut holes for 2-3 minutes, turning occasionally, until golden brown and cooked through. Remove with a slotted spoon and drain on paper towels.
-
6Brush the warm donut holes with melted butter and roll in cinnamon sugar to coat. Serve warm.
Approximate Information for One Serving
Nutrition Disclaimers
Number of total servings shown is approximate. Actual number of servings will depend on your preferred portion sizes.
Nutritional values shown are general guidelines and reflect information for 1 serving using the ingredients listed, not including any optional ingredients. Actual macros may vary slightly depending on specific brands and types of ingredients used.
To determine the weight of one serving, prepare the recipe as instructed. Weigh the finished recipe, then divide the weight of the finished recipe (not including the weight of the container the food is in) by the desired number of servings. Result will be the weight of one serving.
Did you make this recipe?
Please consider Pinning it!!