

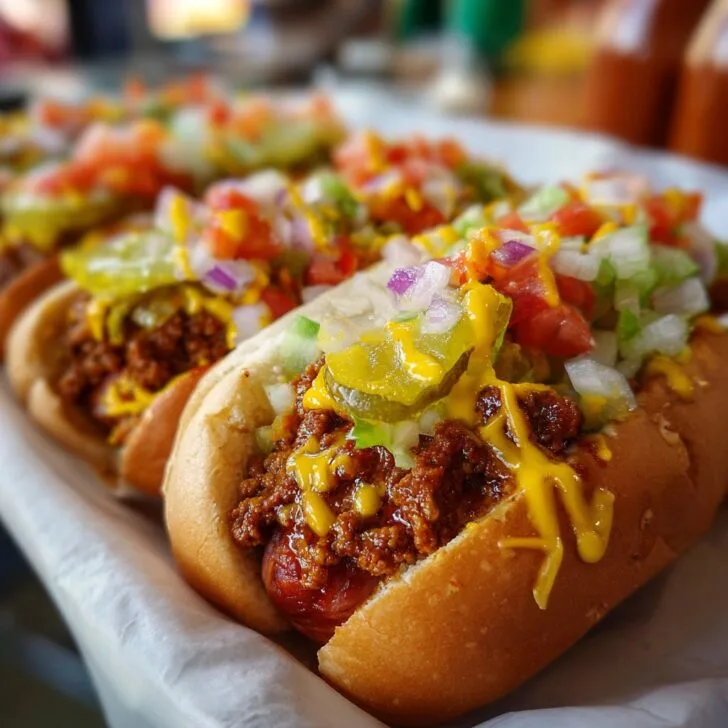
Hey y'all! If you're craving true American comfort food, look no further than these Coney Island Chili Hot Dogs. With juicy hot dogs smothered in a rich, savory chili sauce and topped with crisp onions and mustard, every bite is an explosion of flavor. These crowd-pleasing dogs are perfect for game nights, backyard barbecues, or a nostalgic family dinner. Let's get cooking!
Why You'll Love This Coney Island Chili Hot Dogs Recipe
- Loaded with bold, savory chili that perfectly complements juicy hot dogs.
- Fun and easy to make, great for feeding a crowd or a cozy weeknight treat.
- Customizable with your favorite toppings and spice levels.
- Ready in under an hour, including prep and cook time.
- Perfectly balances soft buns, meaty chili, and tangy toppings for irresistible texture.
Ingredients for Coney Island Chili Hot Dogs
- 8 beef hot dogs
- 8 hot dog buns
- 1 tablespoon olive oil
- 1 small yellow onion, finely chopped (plus extra for topping)
- 2 cloves garlic, minced
- 1 pound lean ground beef
- 2 tablespoons tomato paste
- 1 cup beef broth
- 2 teaspoons yellow mustard (plus more for topping)
- 1 teaspoon Worcestershire sauce
- 1 teaspoon chili powder
- ½ teaspoon ground cumin
- ½ teaspoon smoked paprika
- ½ teaspoon salt
- ¼ teaspoon black pepper
- 1 teaspoon brown sugar
How to Make Coney Island Chili Hot Dogs
Step 1: Prepare the Coney Island Chili
- Heat olive oil in a large skillet over medium heat. Add chopped onion and cook for 3-4 minutes, until soft and fragrant.
- Add garlic and ground beef. Cook, breaking up the beef with a spoon, until browned and no longer pink—about 5-6 minutes.
- Stir in tomato paste, chili powder, cumin, smoked paprika, salt, black pepper, and brown sugar. Cook for 1 minute to bloom the spices.
- Pour in beef broth, Worcestershire sauce, and yellow mustard. Bring to a simmer, then reduce heat to low. Let the chili simmer uncovered for 15-20 minutes, stirring occasionally, until thickened.
Step 2: Cook the Hot Dogs
- While the chili simmers, cook the hot dogs by grilling, boiling, or pan-searing them until heated through (about 5-7 minutes).
- Warm the hot dog buns by wrapping them in foil and placing in a 300°F (150°C) oven for 5 minutes.
Step 3: Assemble the Coney Island Chili Hot Dogs
- Place each cooked hot dog in a warmed bun.
- Spoon a generous amount of hot chili over each dog.
- Top with finely chopped onions and a squiggle of yellow mustard. Serve immediately!


Notes for the Best Coney Island Chili Hot Dogs
- For extra flavor, toast your buns in a skillet with a little butter. Learn more about perfect bun toasting methods.
- Make the chili a day ahead—flavors deepen as it sits.
- Use all-beef hot dogs for the most authentic taste.
Coney Island Chili Hot Dogs: Variations
- Spicy Kick: Add a diced jalapeño or a few dashes of hot sauce to the chili.
- Cheesy Coney: Sprinkle shredded cheddar cheese over the chili before serving.
- Turkey Dogs: Swap ground beef and regular hot dogs for turkey alternatives for a lighter version.
Equipment Needed for Coney Island Chili Hot Dogs
- Large skillet or saucepan
- Wooden spoon or spatula
- Small knife and cutting board
- Measuring cups and spoons
- Grill, pan, or pot for hot dogs
- Foil (for warming buns)
Storage Instructions for Coney Island Chili Hot Dogs
- Store leftover chili in an airtight container in the refrigerator for up to 4 days.
- Reheat chili gently on the stove or in the microwave.
- Assembled hot dogs are best enjoyed fresh, but you can store them wrapped in foil in the fridge for up to 1 day.
- For longer storage, freeze the chili for up to 2 months—thaw overnight in the refrigerator before reheating.
Serving Suggestions & Pairings for Coney Island Chili Hot Dogs
- Serve with classic French fries, potato chips, or a tangy coleslaw.
- Pair with a crisp, cold lager or root beer for a true Coney Island experience.
- Try alongside a side of dill pickles or a green salad for freshness.
Pro Tips for Outstanding Coney Island Chili Hot Dogs
- Simmer the chili uncovered for a thick, scoopable consistency. Check out this guide to perfect chili for more tips.
- Chop onions very finely for topping—they add crunch without overpowering.
- Don’t skip the yellow mustard on top; it’s a classic touch that zings up the whole dish!
Coney Island Chili Hot Dogs FAQ
- Can I make the chili ahead of time?
- Absolutely! The chili tastes even better after a day—just reheat before serving.
- Do I have to use beef hot dogs?
- No, you can use pork, turkey, or plant-based hot dogs if you prefer.
- What makes Coney Island chili different?
- Coney Island chili is beanless, finely textured, and richly spiced, specially designed for topping hot dogs. Learn more about it here.
Prep Time: 15 minutes
Cook Time: 35 minutes
Total Time: 50 minutes
Yield: 8 hot dogs


Ingredients
- 4 beef hot dogs
- 4 hot dog buns
- ½ pound ground beef
- ½ cup finely chopped onion, plus extra for topping
- 2 cloves garlic, minced
- 1 tablespoon tomato paste
- 1 tablespoon yellow mustard
- 1 tablespoon chili powder
- ½ teaspoon ground cumin
- ½ teaspoon salt
- ¼ teaspoon black pepper
- 1 cup beef broth
- 1 tablespoon Worcestershire sauce
Instructions
-
1In a medium skillet over medium heat, cook the ground beef, breaking it up with a spoon, until browned. Drain excess fat.
-
2Add chopped onion and minced garlic to the skillet. Cook for 2-3 minutes until softened.
-
3Stir in tomato paste, yellow mustard, chili powder, cumin, salt, and black pepper. Cook for 1 minute until fragrant.
-
4Pour in beef broth and Worcestershire sauce. Simmer uncovered for 15-20 minutes, stirring occasionally, until the chili thickens.
-
5While the chili simmers, grill or boil the hot dogs until heated through. Warm the buns.
-
6Place each hot dog in a bun, top generously with chili, and sprinkle with extra chopped onions. Serve immediately.
Approximate Information for One Serving
Nutrition Disclaimers
Number of total servings shown is approximate. Actual number of servings will depend on your preferred portion sizes.
Nutritional values shown are general guidelines and reflect information for 1 serving using the ingredients listed, not including any optional ingredients. Actual macros may vary slightly depending on specific brands and types of ingredients used.
To determine the weight of one serving, prepare the recipe as instructed. Weigh the finished recipe, then divide the weight of the finished recipe (not including the weight of the container the food is in) by the desired number of servings. Result will be the weight of one serving.
Did you make this recipe?
Please consider Pinning it!!