
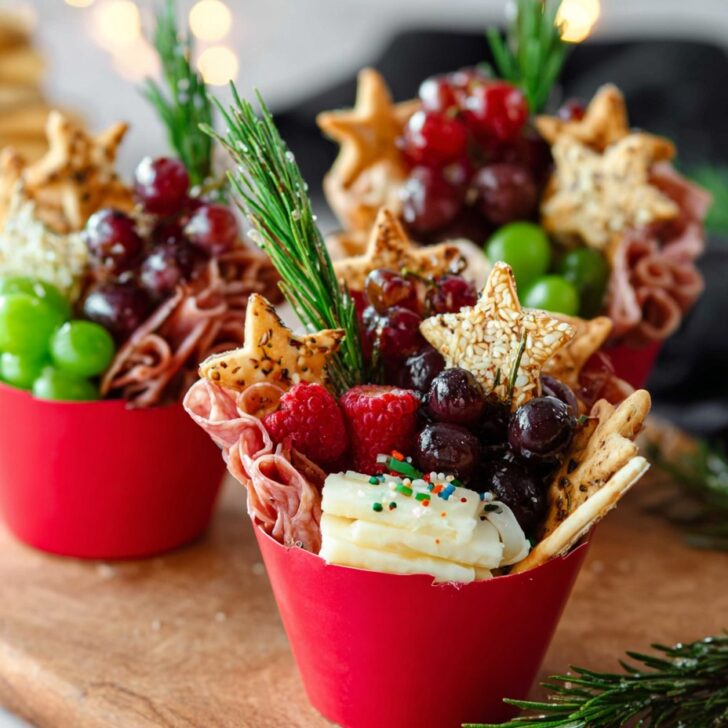
Hey y’all! Looking for a festive, delicious, and downright adorable appetizer for your next holiday party? These Christmas Charcuterie Cups are the ultimate blend of convenience, charm, and bold, savory flavors—making them the perfect addition to any Christmas gathering, potluck, or cocktail party. Each cup is a personalized, portable serving of charcuterie goodness. Let’s get assembling!
Why You’ll Love This Christmas Charcuterie Cups Recipe
- Perfect for parties—individual servings let guests mingle easily without crowding a board.
- Totally customizable—pick your favorite meats, cheeses, and accoutrements to match any taste or dietary need.
- Quick and easy to make—no baking required, ready in under 30 minutes!
- Visually stunning—festive garnishes bring instant holiday cheer to your table.
- Portable and mess-free, just grab a cup and snack away!
Christmas Charcuterie Cups Ingredients
- 8 ounces assorted cured meats (salami, prosciutto, pepperoni), sliced or rolled
- 8 ounces cubed cheeses (cheddar, gouda, mozzarella, or pepper jack)
- 1 cup mini mozzarella balls (bocconcini), drained
- 1 cup grape or cherry tomatoes
- 1 cup assorted olives (green and black), pitted
- 1 cup small pickles (cornichons or gherkins)
- 1 cup fresh berries (cranberries, raspberries, or grapes for color)
- 1 cup crackers (mini water crackers or breadsticks)
- 8-10 sprigs fresh rosemary, for garnish
- Honey or jam packets (optional)
- 8-10 clear plastic cups (9-10 oz size)
- 8-10 cocktail picks or holiday-themed toothpicks
How to Make Christmas Charcuterie Cups
Step 1: Prep Ingredients for Charcuterie Cups
Wash and dry all produce. Cut cheeses into uniform bite-sized cubes. If desired, marinate mozzarella balls or olives briefly in olive oil and herbs for extra flavor (learn more about building charcuterie boards).
Step 2: Skewer & Arrange in Cups
Thread 2-3 items (such as mozzarella, tomato, and olive or a combo of meats and cheese) onto cocktail picks. Stand the picks up inside each cup.
Step 3: Assemble the Cups
Add layers of cubed cheese, crackers, folded meats, pickles, and berries, alternating for a visually appealing look. Fill each cup until generously full but not overcrowded.
Step 4: Garnish & Serve
Tuck in a fresh sprig of rosemary for a pine-like, holiday touch. For something extra, nestle in a honey or jam packet. Chill until serving if desired.
Christmas Charcuterie Cups Notes & Tips
- Use sturdy cups that hold their shape to support skewers and heavier items—no wobbly cups wanted!
- For extra pizzazz, wrap cups with festive ribbon or small gift tags.
- For detailed cheese selection tips, check out this ultimate cheese guide.

Variations for Christmas Charcuterie Cups
- Vegetarian Cups: Skip the meat and add marinated artichokes, roasted bell peppers, and extra nuts.
- Mini Antipasto Cups: Add marinated mushrooms, sun-dried tomatoes, and sliced pepperoncini for an Italian twist.
- Sweet & Savory Cups: Include dried fruits like apricots or figs, and candied nuts for sweetness balanced with the salty meats and cheeses.
Required Equipment for Christmas Charcuterie Cups
- Cutting board and sharp knife
- 8-10 sturdy plastic cups (9-10 oz)
- Cocktail picks/toothpicks (holiday-themed if desired)
- Small serving tongs (optional)
Christmas Charcuterie Cups Storage Instructions
Cover the assembled cups tightly with plastic wrap and refrigerate for up to 24 hours. For best texture and flavor, enjoy within 24 hours, though meats and cheeses will remain safe for up to 2 days. Avoid adding crackers until just before serving to prevent sogginess (food safety reference).
Pairings & Serving Suggestions for Christmas Charcuterie Cups
- Pair with festive cocktails, sparkling wine, or apple cider for a celebratory vibe.
- Serve alongside a simple green salad or roasted nuts for a light, complete appetizer spread.
- Arrange on a tray or tiered stand for an impressive buffet display.
Pro Tips for Perfect Christmas Charcuterie Cups
- Balance flavors and textures—mix salty, sweet, crunchy, and creamy elements for the best cup.
- Choose brightly colored ingredients for striking holiday presentation (think reds and greens!).
- Don’t overpack cups; leave a little breathing room for easy snacking and a pretty look (more appetizer inspiration).
FAQ: Christmas Charcuterie Cups
- Q: Can I make Christmas Charcuterie Cups ahead of time?
A: Yes! Assemble up to 24 hours ahead, but add crackers right before serving to keep them crisp. - Q: What cheeses work best?
A: Opt for firm, flavorful cheeses like cheddar, gouda, manchego, and mozzarella—avoid anything too soft or crumbly. - Q: Are these cups kid-friendly?
A: Absolutely—customize with mild meats, kid-favorite cheeses, and cut fruit to suit younger guests.
Prep Time: 20 minutes
Total Time: 25 minutes
Servings: 8-10 cups

Ingredients
- 6 small disposable cups or jars
- 6 slices salami, folded
- 6 slices prosciutto, rolled
- 3 oz cheddar cheese, cubed
- 3 oz mozzarella cheese, cubed
- 12 seedless grapes, red or green
- 1/2 cup mixed nuts (almonds, cashews, or pecans)
- 6 mini pretzel sticks
- 3 oz cherry tomatoes
- Fresh rosemary sprigs for garnish
Instructions
-
1Arrange the disposable cups or jars on a clean work surface.
-
2Fold the salami slices and roll the prosciutto. Place one of each into each cup.
-
3Add a few cubes of cheddar and mozzarella cheese to each cup.
-
4Thread two grapes and a cherry tomato onto a decorative pick or skewer, then place in each cup.
-
5Add a small handful of mixed nuts and a mini pretzel stick to each cup.
-
6Garnish each charcuterie cup with a fresh rosemary sprig, then serve immediately or refrigerate until ready to serve.
Approximate Information for One Serving
Nutrition Disclaimers
Number of total servings shown is approximate. Actual number of servings will depend on your preferred portion sizes.
Nutritional values shown are general guidelines and reflect information for 1 serving using the ingredients listed, not including any optional ingredients. Actual macros may vary slightly depending on specific brands and types of ingredients used.
To determine the weight of one serving, prepare the recipe as instructed. Weigh the finished recipe, then divide the weight of the finished recipe (not including the weight of the container the food is in) by the desired number of servings. Result will be the weight of one serving.
Did you make this recipe?
Please consider Pinning it!!