
Let’s Talk Christmas Bars (and My Slightly Chaotic Kitchen)
I’ve been making these Christmas bars since—well, actually, I think since my youngest got old enough to help (help, in this house, kind of means more chocolate chips in their mouth than the bowl). So picture this: Frosty night, a kitchen dusted in flour, someone inevitably steps on a rogue sprinkle, and the smell of brown sugar and butter cozies up the house. It’s chaotic. But honestly, these bars just make the holidays for us, partly because they come together quick and also because they never survive more than a single day around here. There was that one year when I forgot the baking powder. Bars were flat as pancakes. Still edible, though! Life’s too short to stress about perfect Christmas treats, right?
Why You’ll Love This Even If You’re Utterly Stressed Out
I whip up Christmas bars when I’m running low on time (and still need something festive that’ll disappear in minutes). My family goes totally bananas for these, mostly because the middle stays all gooey—plus, it’s ridiculously easy to double the batch if you’re hosting extended relatives who seem to pop by unannounced! Oh, and the best bit? They taste just as good if you use random chocolate chips you found in the back of the cupboard; ask me how I know…
I used to hate recipes with too many fiddly steps (looking at you, rolled cookies), but this one? You dump stuff in, mix, bake, done. Even when your hand mixer grinds to a halt (because sticky dough is a thing), they still come out fab.
Here’s What You’ll Need (Scrounge the Pantry, It’s Fine)
- 1 cup (225g) unsalted butter, melted—honestly, I use salted sometimes if that’s what’s left
- 2 cups (400g) light brown sugar (my gran swore by dark, but I think it gets a bit too caramel-y, your call)
- 2 large eggs
- 2 teaspoon vanilla extract—real is best, but I’ve thrown the artificial stuff in a pinch
- 2 ¼ cups (290g) plain flour (I sometimes sub in self-rising and just skip the baking powder—don’t tell anyone)
- ½ teaspoon baking powder (only if not using s/r flour)
- ½ teaspoon salt
- 1 cup red and green M&Ms (could use festive sprinkles, or honestly, just whatever ‘Christmas-colored’ candies are around)
- 1 cup white chocolate chips (milk or dark are grand, or skip for nutty bars)
- Optional: ½ cup chopped walnuts or pecans—sometimes I swap pecans for hazelnuts when I’ve got ’em
How to Make Christmas Bars (This Won’t Take All Day, Promise)
- Preheat oven to 350°F (175°C). Line a 9×13-inch pan with parchment (or grease it really well; I rarely have both parchment and patience at the same time).
- Mix the melted butter with brown sugar in a big bowl. It’ll look weird and sort of gritty—don’t freak out; that’s how it’s supposed to be.
- Add eggs and vanilla and beat until it kind of looks creamy; I use a hand mixer, but if you only have a wooden spoon, go for it (might take a bit more elbow grease).
- Dump in the flour, salt, and baking powder (or not, see my flour note above). Stir until just combined. Actually, I find it works better if you stop as soon as you don’t see dry flour.
- Here’s where I always sneak a taste—raw eggs be damned. Fold in the chocolate chips, M&Ms, and nuts if using.
- Spread the thick mixture into your prepared pan. If you’re battling with sticky dough, use damp fingers to press it in—it’s magic, trust me.
- Bake for 25-30 minutes. The top will look set and a toothpick poked in the middle will come out mostly clean (a bit of goo is fine—these need to be soft!).
- Let cool before slicing, unless you like the edges super molten; personally, I have zero self-control and always cut into them hot.
Little Notes I Wish Someone Had Told Me
- If you’re using glass instead of metal bakeware, bars need an extra 3-ish minutes—or just watch for that golden edge.
- I once tried microwaving the butter to melt it and forgot it in there way too long—bars still turned out, but a bit greasy. So now I keep a closer eye (you’d think I’d learn quicker).
- Cheap chocolate chips, honestly, melt weird but still taste fine. Nobody’s ever complained to me!
Fun fact — one time my cat knocked a bag of flour off the counter mid-mix. The places flour can reach… who knew?
If You Fancy Tinkering (Experimenting is Half the Fun)
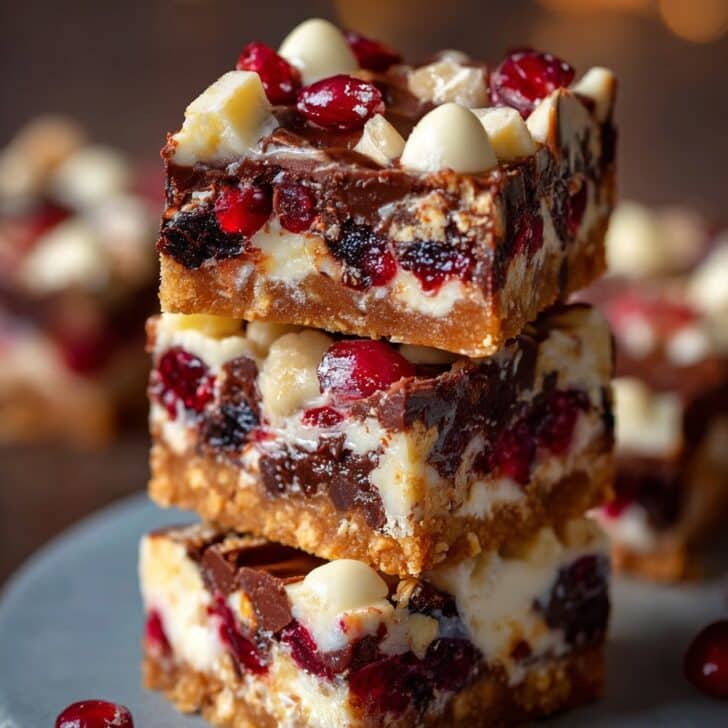
- Switch out white chocolate for cranberries if you like a sharp bite (makes it a bit less sweet—my sister says it tastes more ‘grown up’ but who’s counting).
- I tried subbing in oat flour once. Not my best idea, kind of came out dense as a doorstop. Maybe just stick with regular flour unless you’re gluten-free, and then I’d check out Minimalist Baker’s swaps.
- Top with a quick drizzle of melted chocolate post-bake for extra ooh-la-la (or, you know, festive chaos if letting kids do the honors—unpredictable designs every time).
Do You Actually Need Any Special Equipment? (Probably Not)
- Just a big mixing bowl and a spoon work. I sometimes grab my electric mixer if I’m feeling fancy, but let’s be real—arm power is fine.
- No parchment? Grease the pan with butter and a sprinkle of flour, works almost as well.

How to Store These (If They Even Make It That Far)
I keep leftovers in an airtight container at (cool-ish) room temp. They’ll last three to four days, supposedly. But, truly, in my house these barely make it to the next morning. If you somehow avoid midnight snackers, they do freeze nicely—just wrap them tight. Curious about freezing more holiday treats? Smitten Kitchen has a great guide right here.
How I Like to Serve Christmas Bars (And a Random Tradition)
Honestly, I just plonk them on a plate and call it dessert, but they’re unreal with a mug of strong coffee or homemade cocoa. Sometimes we serve them up with a scoop of vanilla ice cream for Christmas Eve movie night — which usually devolves into the kids picking out all the green candies. Go figure.
Pro Tips (Learned The Hard Way!)
- I once tried to bake these in a rush—took them out too early; they looked ‘set’ on top but went mushy underneath. So, don’t jump the gun. Let them go golden and watch those edges.
- Don’t overmix the dough. Makes the bars tough. I sometimes forget, but when I remember, the difference is magic.
- Cutting them too soon leads to a total (tasty) mess. Actually, on second thought, sometimes the mess is half the fun. Just have napkins handy.
Your Christmas Bar Questions—Answered
- Can I make these gluten free? Yup! Just use your fave gluten-free blend. They might be a bit softer, maybe increase the bake time a notch.
- What if I’m out of M&Ms? No biggie! Chuck in any candy bits, extra chocolate chips, or even toffee bits; it’s all good.
- Can I freeze these? Yep, they freeze grand for up to 2 months. I wrap ‘em well in foil then toss in a zip bag—nothing fancy.
- How can I make these even more festive? Once I colored half the dough green and marbled it—looked wild, tasted the same; but the kids loved it!
- Why are my bars dry? Could be overbaked, or maybe too much flour snuck in. Spoon and level, don’t scoop, and all that jazz.
Got more questions? Just shout—I’m always happy to talk Christmas baking (sometimes whether you want me to or not!). And if you try these, tell me how they turned out. I’m endlessly curious which variation is your favorite, or if your cat manages to cause kitchen chaos too.

Ingredients
- 1 cup unsalted butter, melted
- 1 1/4 cups light brown sugar, packed
- 2 large eggs
- 2 teaspoons vanilla extract
- 2 cups all-purpose flour
- 1 teaspoon baking powder
- 1/2 teaspoon salt
- 1 teaspoon ground cinnamon
- 1 cup white chocolate chips
- 1/2 cup red and green holiday sprinkles
Instructions
-
1Preheat the oven to 350°F (175°C). Line a 9×13-inch baking pan with parchment paper and lightly grease.
-
2In a large bowl, whisk together melted butter and brown sugar until smooth. Add eggs and vanilla extract, and mix until combined.
-
3In a separate bowl, whisk together flour, baking powder, salt, and ground cinnamon. Gradually add dry ingredients to wet ingredients and mix until just combined.
-
4Fold in white chocolate chips and 1/3 cup of holiday sprinkles. Spread the batter evenly in the prepared pan.
-
5Sprinkle the remaining sprinkles on top. Bake for 22-25 minutes or until the edges are golden and a toothpick inserted in the center comes out clean.
-
6Allow to cool completely in the pan before lifting out and slicing into bars. Serve and enjoy!
Approximate Information for One Serving
Nutrition Disclaimers
Number of total servings shown is approximate. Actual number of servings will depend on your preferred portion sizes.
Nutritional values shown are general guidelines and reflect information for 1 serving using the ingredients listed, not including any optional ingredients. Actual macros may vary slightly depending on specific brands and types of ingredients used.
To determine the weight of one serving, prepare the recipe as instructed. Weigh the finished recipe, then divide the weight of the finished recipe (not including the weight of the container the food is in) by the desired number of servings. Result will be the weight of one serving.
Did you make this recipe?
Please consider Pinning it!!