
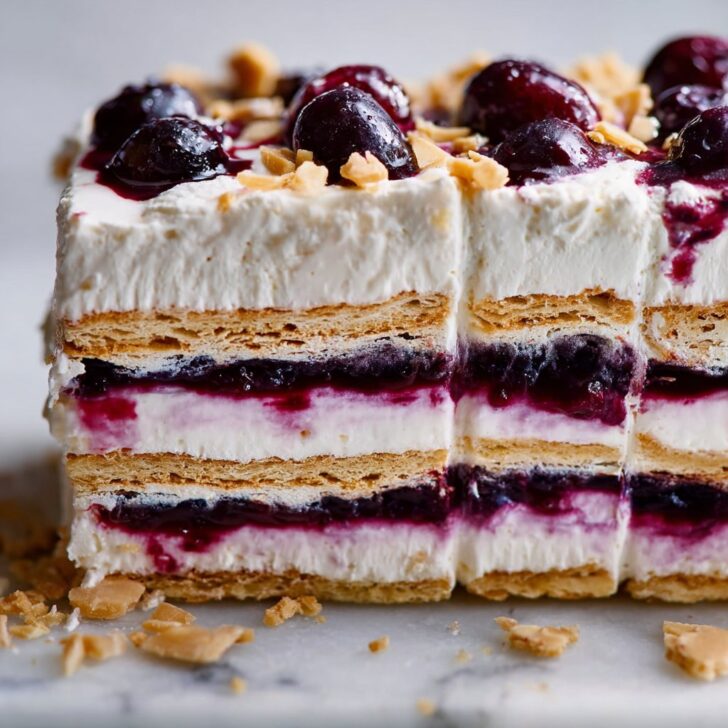

Hey y'all! If you love luscious, fruity desserts that are a breeze to make, this Blueberry Cheesecake Icebox Cake is about to become your new favorite. Creamy cheesecake layers, sweet blueberry filling, and soft graham crackers come together in a dreamy, chilled treat that's perfect for summer parties, potlucks, or anytime you crave something sweet without turning on the oven. Let’s get cooking!
Why You'll Love This Blueberry Cheesecake Icebox Cake
- No baking required—just layer, chill, and enjoy!
- Creamy cheesecake filling paired with juicy blueberries for a crowd-pleasing flavor.
- Easy to prepare ahead, making it ideal for entertaining.
- Simple ingredients and minimal equipment needed.
- Perfectly refreshing for hot days or festive celebrations.
Blueberry Cheesecake Icebox Cake Ingredients
- 2 cups fresh or frozen blueberries
- ½ cup granulated sugar
- 2 tablespoons cornstarch
- ½ cup water
- 1 teaspoon lemon zest
- 16 ounces cream cheese, softened
- 1 cup powdered sugar
- 2 teaspoons vanilla extract
- 2 cups heavy whipping cream
- 1 (14.4-ounce) box graham crackers
- Extra blueberries and lemon zest for garnish (optional)
Blueberry Cheesecake Icebox Cake Directions
Step 1: Prepare the Blueberry Filling
- In a small saucepan, combine blueberries, granulated sugar, cornstarch, and water.
- Cook over medium heat, stirring frequently, until the mixture thickens and the blueberries burst (about 8-10 minutes).
- Stir in lemon zest, remove from heat, and let cool completely.
Step 2: Make the Cheesecake Layer
- In a large mixing bowl, beat softened cream cheese, powdered sugar, and vanilla extract until smooth and creamy.
- In a separate bowl, whip the heavy cream until stiff peaks form.
- Gently fold the whipped cream into the cream cheese mixture until fully combined.
Step 3: Assemble the Icebox Cake
- In a 9x13-inch dish, arrange a single layer of graham crackers on the bottom.
- Spread one-third of the cheesecake mixture evenly over the crackers.
- Spoon and swirl one-third of the cooled blueberry filling over the cheesecake layer.
- Repeat the layers two more times, ending with the blueberry topping.
- Cover and refrigerate for at least 6 hours, or overnight for best texture.
Step 4: Garnish and Serve Your Blueberry Cheesecake Icebox Cake
- Before serving, top with extra blueberries and a sprinkle of lemon zest, if desired.
- Slice, serve chilled, and enjoy!
Notes for Blueberry Cheesecake Icebox Cake Success
- Ensure your cream cheese is fully softened to avoid lumps in the filling.
- For an extra burst of flavor, use pure vanilla extract (King Arthur Baking) in the cheesecake layer.
- Let the cake chill overnight for the best sliceable texture and flavor blend.


Blueberry Cheesecake Icebox Cake Variations
- Strawberry Swirl: Swap blueberries for strawberries for a different fruity twist.
- Gluten-Free: Use gluten-free graham crackers to make the dessert celiac-friendly.
- Lemon Cheesecake: Add 2 tablespoons of lemon juice to the cheesecake mixture for a tangy kick.
Required Equipment for Blueberry Cheesecake Icebox Cake
- 9x13-inch baking dish
- Electric mixer or stand mixer
- Mixing bowls
- Rubber spatula
- Small saucepan
Blueberry Cheesecake Icebox Cake Storage Instructions
Store the icebox cake covered in the refrigerator for up to 5 days. For longer storage, freeze individual slices tightly wrapped for up to 2 months. Thaw overnight in the fridge before serving.
Blueberry Cheesecake Icebox Cake Serving Recommendations
- Pair with a glass of iced tea or sparkling lemonade for a refreshing combo.
- Serve alongside fresh fruit or a scoop of vanilla ice cream for an extra treat.
- Top with toasted nuts or a drizzle of white chocolate for added elegance.
Pro Tips for Blueberry Cheesecake Icebox Cake
- Make sure to whip your cream to stiff peaks (Sally’s Baking Addiction) for a stable cheesecake filling.
- Line your dish with parchment for easy removal and clean slices.
- Chill for at least 6 hours (overnight is best!) to let the flavors fully meld and the cake set perfectly.
Blueberry Cheesecake Icebox Cake FAQ
Can I use store-bought blueberry pie filling?
Yes, you can substitute homemade blueberry filling with your favorite store-bought blueberry pie filling to save time.
Can I make Blueberry Cheesecake Icebox Cake ahead of time?
Absolutely! This dessert is even better when made a day in advance and chilled overnight.
Can I use other berries or fruits?
Definitely! Raspberries, blackberries, or even peaches work beautifully as a substitute for blueberries.
For more nutritional information about blueberries, check out this article from Healthline.


Ingredients
- 2 cups fresh blueberries
- 1 ½ cups heavy whipping cream
- 8 oz cream cheese, softened
- ½ cup powdered sugar
- 1 teaspoon vanilla extract
- 1 ½ cups graham cracker crumbs
- ¼ cup unsalted butter, melted
- ⅓ cup blueberry jam
Instructions
-
1In a medium bowl, combine graham cracker crumbs and melted butter. Mix until the crumbs are evenly coated.
-
2Press half of the crumb mixture into the bottom of an 8x8-inch baking dish to form the crust. Set aside.
-
3In a large bowl, beat cream cheese, powdered sugar, and vanilla extract until smooth. In a separate bowl, whip the heavy cream to stiff peaks, then gently fold into the cream cheese mixture.
-
4Spread half of the cheesecake filling over the crust. Top with half of the blueberries and drizzle with half of the blueberry jam.
-
5Repeat layers with remaining crumb mixture, cheesecake filling, blueberries, and jam. Smooth the top and cover with plastic wrap.
-
6Refrigerate for at least 6 hours or overnight. Slice and serve chilled.
Approximate Information for One Serving
Nutrition Disclaimers
Number of total servings shown is approximate. Actual number of servings will depend on your preferred portion sizes.
Nutritional values shown are general guidelines and reflect information for 1 serving using the ingredients listed, not including any optional ingredients. Actual macros may vary slightly depending on specific brands and types of ingredients used.
To determine the weight of one serving, prepare the recipe as instructed. Weigh the finished recipe, then divide the weight of the finished recipe (not including the weight of the container the food is in) by the desired number of servings. Result will be the weight of one serving.
Did you make this recipe?
Please consider Pinning it!!